

Get Sharp Results: A Step-by-Step Guide to Sharpen Blurry Images
Have you ever taken a photograph that, to your disappointment, turned out to be blurry? Don’t worry; it happens to everyone, even the most experienced photographers. However, it doesn’t have to stay that way. You can easily sharpen a blurry image and turn it into a stunning masterpiece. All it takes is a few simple steps, and you’ll be on your way to achieving perfect results. Whether you’re a beginner or a professional, learning how to sharpen a blurry image can help you take your photography to the next level. From understanding the basic principles of sharpening images to using the right tools, this guide will help you learn how to sharpen a blurry image quickly and efficiently. So let’s get started!
Part 1: Understanding the Basics of Sharpening Images
Before you start sharpening your images, it’s important to understand the basics of image sharpening. To sharpen an image, you will need to adjust the contrast between adjacent pixels. This can be done using a number of different methods, but the most common is to use a sharpening filter. This filter will increase the contrast between adjacent pixels, resulting in a sharper image.
The amount of sharpening you apply to an image will depend on the type of image and the desired result. For example, if you’re sharpening a portrait image, you may want to apply a subtle amount of sharpening to bring out the details in the subject’s face. On the other hand, if you’re sharpening a landscape image, you may want to apply a more aggressive amount of sharpening to bring out the details in the scenery.
Part 2: Precautions to Take before Sharpening an Image
Before you start sharpening an image, it’s important to take a few precautions. First, make sure that the image you’re sharpening is in the highest possible resolution. If the image is low-resolution, sharpening it may result in a blurred or pixelated image. It’s important to note that sharpening an image can be a delicate process. If you over-sharpen an image, it can look grainy or pixelated. Too much sharpening can also make the image look unnatural.
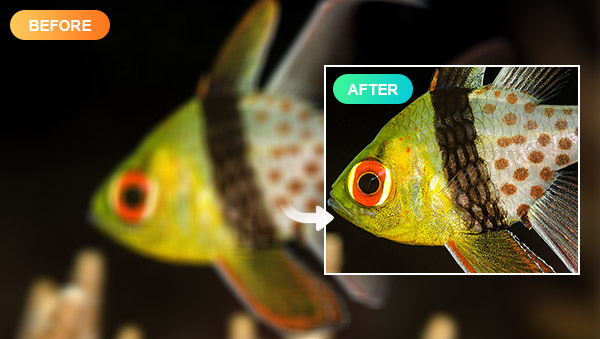
Part 3: Sharpen Blurry Images: Traditional Photo Editor or AI Sharpener?
Sharpening may seem very simple, but in fact, to achieve the best sharpening state for photos, the content that needs to be adjusted, and operation steps are very complex, and there are many factors that need attention; if you are not careful, you may under sharpen, oversharpen, and have serious white border, or even damaging the image quality. This is very complicated for those who have not studied photo editions systematically. As mentioned before, if your images are low resolution and blurry, then simply global sharpening will only add graininess, making the image look worse. Based on the above two premises, using an AI sharpener seems to be a better choice for most people.
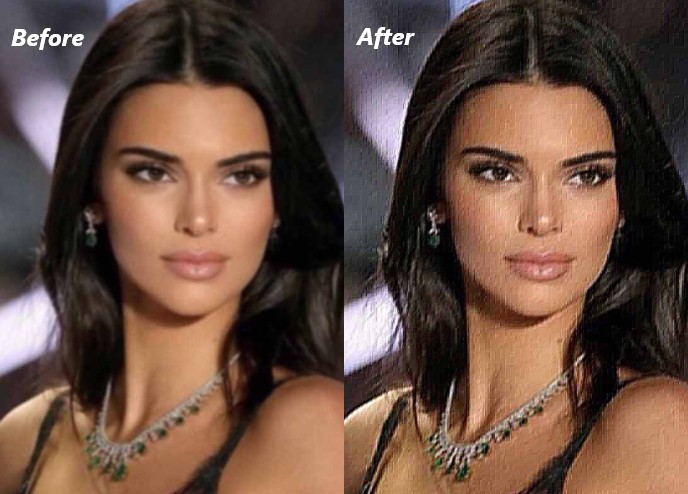
Part 4: Step-by-step Guide to Sharpening a Blurry Image
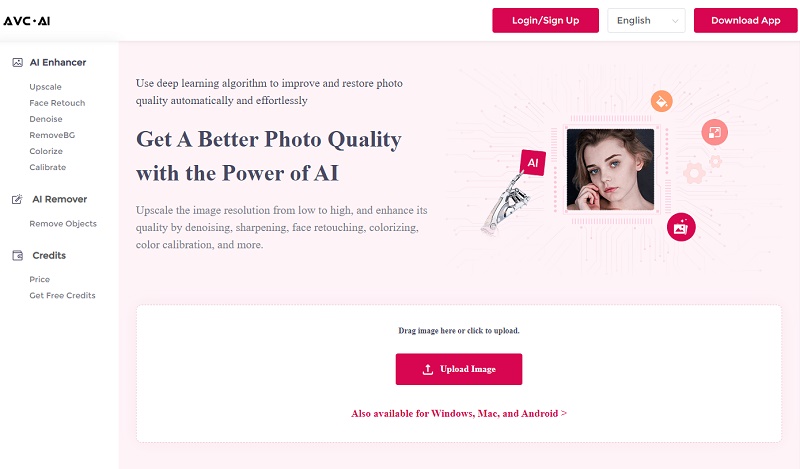
Among the many AI sharpeners on the market, AVC.AI is the one that performs well in all aspects. As an online AI tool, you don't need to download any software. Its operation is simple, but the effect is remarkable.
Step 1: Upload Images
Visit the official website of AVC.AI and log in. Newly registered users will be rewarded with complimentary credits upon their first login. Then, simply click Upload Image or just drag and drop blurry images to the site. Another advantage of using AVC.AI to sharpen blurry images is that it supports versatile input formats, including *.png, *.jpg, *.jpeg, *.bmp, *.jfif, and *.webp.
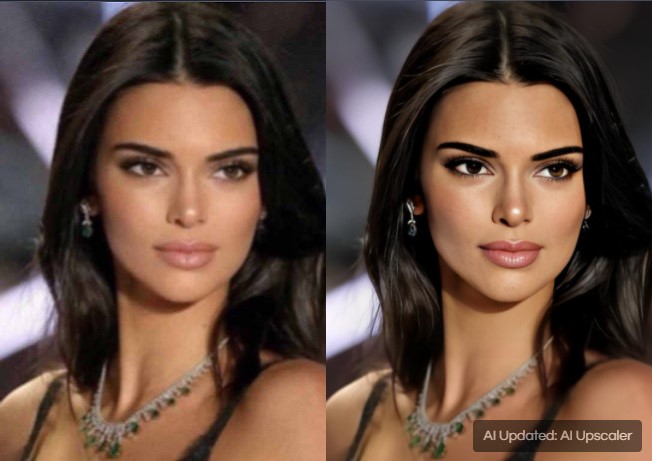
Step 2: Start to Sharpen Blurry Images
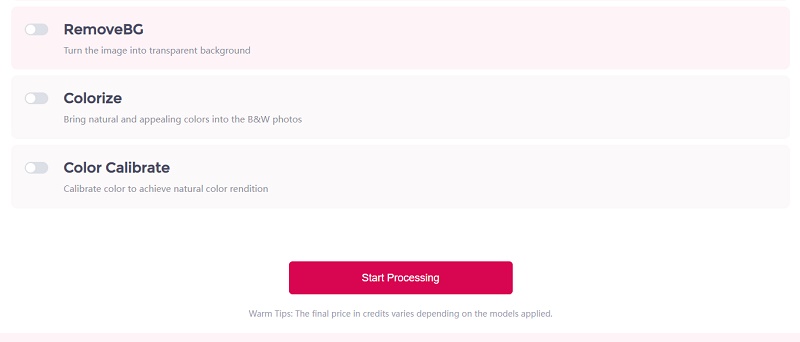
AVC.AI has rich functions, after uploading an image you just need to select the appropriate model. Here you may choose Upscale. If you want to enlarge images simultaneously, then you need to select the corresponding scale. Apart from the Upscale model, it is highly recommended you try other functions like colorizing black and white images, denoising, removing background, etc.
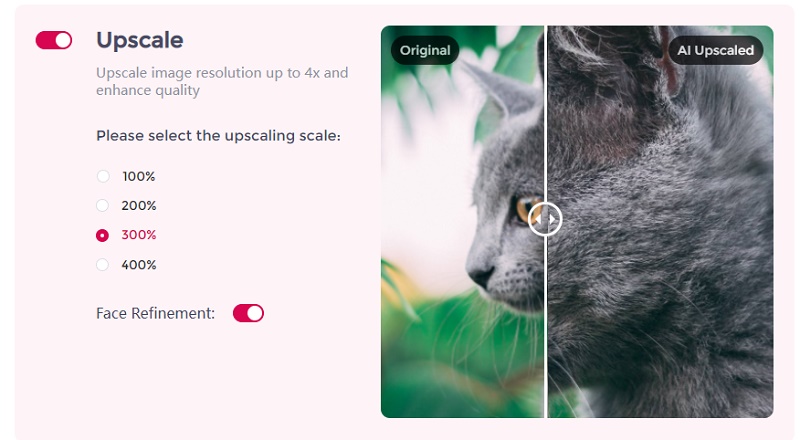
Once the images and models have been selected, press the Start Processing button to initiate the sharpening process.
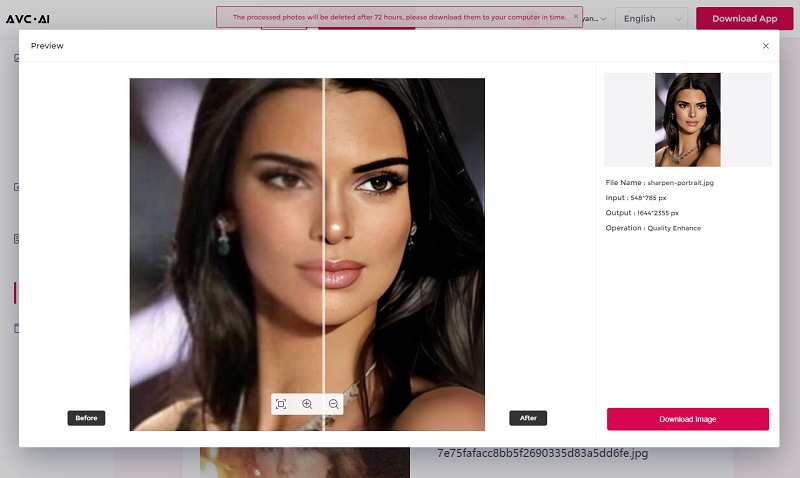
Step 3: Save Processed Images to Computer
After you initiate the image processing, it will only take a few seconds to complete. You can then press the Eye icon to have a look at the outcomes. Lastly, pick the Download Image choice to save the altered photograph. Remember to quickly download the sharpened pictures, as they will be erased after 3 days for your privacy protection.
Conclusion
Sharpening a blurry image can be a tricky process. However, with the right knowledge and tools, it’s possible to get sharp, crisp images. In this blog article, we’ve provided a step-by-step guide to sharpening a blurry image, as well as the basics and precautions of sharpening. If you follow the tips and tricks in this blog article, you’ll be on your way to getting sharp, crisp images in no time. So don’t let blurry images ruin your photos – get sharp results with this step-by-step guide to sharpen blurry images.
Download Desktop Version of AVC.AI

Syncios D-Savior
Recover all types of data from HDDs, USB drives, SD cards, SSDs, etc. Learn more >>

Photo Enhancer AI
AI Image Upscale, Denoise, Colorize, Sharpen and Calibrate to enhance your photo quality.
AI Online Image and Video Tools
More AI-Powered Products
Tricks and Tips
- Top 8 AI Image Generators No Restrictions in 2025
- How to Blur Video in Canva: 5 Super Easy Steps
- 3 Ways to Fix Out-of-Focus Video: A Step-by-Step Guide
- Top 3 8K Video Players for PC in 2025 [Free & Paid]
- How to Convert Videos from 480P to 1080P
- Snapchat Face Swap: How to Change Face and Its Alternatives
- AI Video Upscaling: An Easy Way to Upscale Video to 1080p or 4K
- Perchance AI Image Generator: Full Review & Best Alternatives
- Topaz Video AI Review 2025: Is It Worth it?
- Free to Upscale SD Video to HD, 4K, and 8K in 2025
- Best 7 AI Hentai Generators in 2025 [Desktop & Online]
- How to Improve Video Quality Online for Free
- Best 5 Online Tools to Turn Pictures Into Coloring Pages For Free
- 10 Best Furry AI Generators to Free Create Fursona Art
- How to Blur the Background in Microsoft Teams on Windows, Mac, iOS and Android
- How to Unblur an Image
- 3 Best Forensic Video Enhancement Software
- 3 Methods to Fix Out of Focus Photo Easily in 2025
- 6 Best AI Photo Restoration Apps to Restore Old Photos
- How to Get Good Video Quality on CapCut Desktop [5 Ways Included]
- Sharpen Blurry Photos Online for Free
More Hot Articles
- 5 Unrestricted AI Image Generators in 2025 [Free]
- Best 4 AI Clothing Removers to Remove and Change Clothes in Photos
- Gramhir.pro AI Photo Generator Review and Its Alternative
- How to Mosaic Face in Videos to Keep Privacy Safe
- 11 Best Free Video Editing Software for Beginners (PC and Mac) in 2025
- How to Blur Background in iPhone Video (6 Practical Methods)
- How to Blur Licence Plate in Video: 5 Methods to Protect Your Privacy