

How to Unpixelate Images: The Ultimate Guide to Get the Best Quality
Pixelation is really a common issue encountered by almost everyone. While unpixelating an image can be a tricky process and requires a bit of knowledge and skill. This guide will teach you how to unpixelate images and get the best quality result. You'll learn the basics of pixelated images, different techniques, and tools you can use to make the image look as sharp and clear as possible. So whether you're a professional photographer or a casual hobbyist, this guide will help you get the most out of your images.
![]()
Part 1: Basics of Pixelation and Unpixelating Images
1. What is Pixelation?
Pixelation is the process of reducing the clarity of an image by reducing the number of pixels. This can occur for a variety of reasons, such as image compression, image editing, and image capturing errors. Pixelation can cause images to become blurry, unclear, or appear in black and white. It can also create a jagged effect on the image. Pixelation is most commonly seen in images that have been compressed, which reduces the file size and can cause a jagged, pixelated look. There are two types of pixelation that you might encounter: pattern noise pixelation and banding pixelation. Pattern noise pixelation occurs randomly throughout the image, while banding pixelation occurs as a single, continuous line. The former one is more common and can be caused by low-quality image editing software, low-quality images, and low-quality scanning devices. Banding pixelation is generally caused by low-quality image compression, and can also be a result of errors in image capturing
2. Different Techniques for Unpixelating Images
Unpixelating an image is the process of restoring a pixelated image to its original, sharper state. It can be achieved with a number of different techniques, depending on the type of pixelation and the desired outcome. Here are some of them:
One technique for unpixelating images is to use a filter to blur and soften them. This method will help reduce sharp edges that are present in highly pixelated images and help to smoothen out any noticeable blocks of pixels. Image editing software such as Photoshop or GIMP has built-in filters that can be used for this purpose.
Another technique is to employ image interpolation algorithms, which fill in gaps between pixels by estimating values based on surrounding pixel data. These types of algorithms can be used to significantly reduce the amount of pixelation in an image, enabling it to appear sharper and smoother. Image editing software such as Adobe Lightroom can also be used for this purpose.
Finally, unpixelating images can also be achieved through a technique known as deep learning and super-resolution. This involves capturing multiple low-resolution images of the same subject and combining them into one higher-resolution image. By taking multiple photographs at different angles or with different lighting conditions, more detail is picked up by the camera, which can then be combined into a single pixelated image.
Part 2: How to Unpixelate an Image With Super Resolution---The Most Effective and Easiest Way
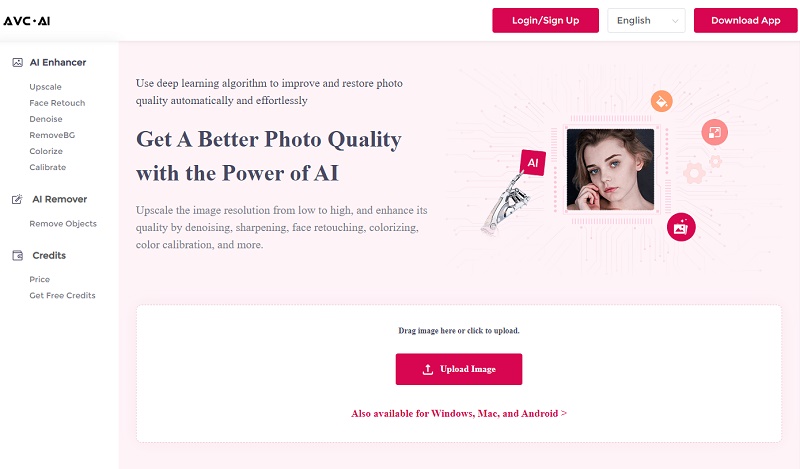
Super-resolution algorithms analyze the structure of the pixels and create new ones that better represent the original image. This can help to unpixelate images that have been degraded by compression or other processes, giving them back their sharpness and clarity. Using this technique, highly detailed photos can be recovered from low-resolution versions, allowing you to zoom into sections of an image without it becoming blurry or pixelated. AVC.AI is exactly such an amazing online tool using deep-learning-based super-resolution, which can fix pixelated images, upscale the image resolution by 400% and improve details, as well as remove defects and compression artifacts. The following is a detailed tutorial on how to unpixelate images with AVC.AI.
Steps to Unpixelate Images with AVC.AI
Step 1: Go to the Official Website
Go to the official website of AVC.AI and register an account to get free credits.
Step 2: Upload Pixelated Images
AVC.AI supports batch processing, so you are allowed to import more than one image by clicking the Upload Image button and processing them all together.
Step 3: Select AI Models and Start Processing
Select the proper model from the five models based on your need. To unpixelate an image, you need to select the Upscale model, then choose the upscaling scale if you want to enlarge the image at the same time.
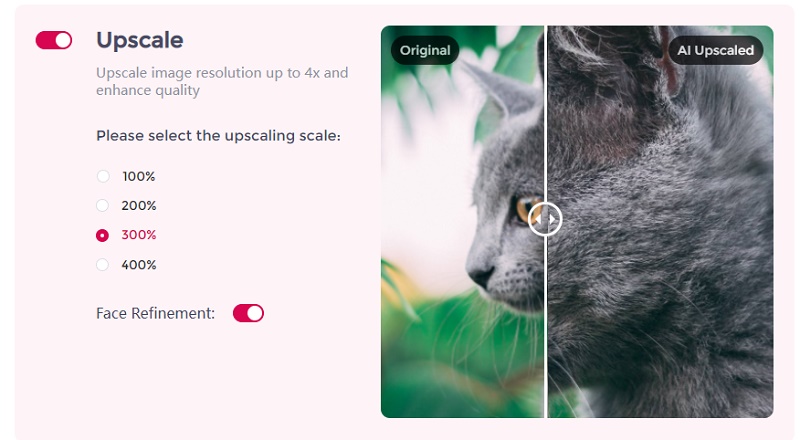
Step 4: Preview and Download Unpixelated Images
Once you have chosen your models, click the Start Processing button to begin the unpixelation process. The image will be ready in just a few seconds. To view the transformation, press the Eye icon. If you are pleased with the outcome, click Download Image to save it. It is essential to download the processed pictures within 72 hours, as they will be removed from the system for privacy reasons.
![]()
Conclusion
The above is the basic knowledge of fixing pixelation in images and the exact steps of one of the easiest ways to unpixelate your images. There are many factors that can cause pixelation, so pixelated images are really common. But by following the few steps outlined in this article, you can quickly fix images and get high-quality results freely.
Download Desktop Version of AVC.AI

Syncios D-Savior
Recover all types of data from HDDs, USB drives, SD cards, SSDs, etc. Learn more >>

Photo Enhancer AI
AI Image Upscale, Denoise, Colorize, Sharpen and Calibrate to enhance your photo quality.
AI Online Tools for Images
More AI-Powered Products
Tricks and Tips
- How to Remove Objects from Photos Freely
- Best Free Online Image Quality Enhancer
- Collection of 6 Objects Remover Apps: Meet All of Your Demands
- Best App to Remove People from Your Photos Easily
- 5 Best Apps to Remove Objects From Photos: An In-Depth Review
- Remove Watermarks from Photos Online for Free
- How to Remove Watermarks from Photos Without Losing Any Quality
- How to Remove Unwanted Objects from Photos Online for Free
- How to Unpixelate Images: The Ultimate Guide to Get the Best Quality
- A Step-by-Step Guide to Sharpen Blurry Images
- How to Sharpen Images Online for Free
- How to Use AI Image Sharpening to Fix Blurry Images Freely?
- How to Unblur Images Online for Free
- How to Unblur Images Quickly and Easily
- Top 8 Best Image Enlargers for Windows and Mac
- How to Increase Resolution of Your Image
- Top 5 AI Image Upscalers
- Best Online Image Enlarger
- Increase Image Size without Losing etails
- Increase Image Size Online
- Restore Old and Low-quality Photos with AI
- 6 Best Photo Restoration Tools for Pros and Novices