![]() One management tool for all smartphones to transfer files between PC & iOS/Android devices.
One management tool for all smartphones to transfer files between PC & iOS/Android devices.

![]() >How-tos>Android Tutorial >How to Transfer Photos between OPPO Find X and PC
>How-tos>Android Tutorial >How to Transfer Photos between OPPO Find X and PC
Modern people will take their mobile phones instead of digital cameras out when they need to take photos. Taking pictures became more and more convenient, which encourage people to take more and more photos. But too many pictures in the mobile phone may lead the slow operation of the device. So it is necessary for you to transfer the photos from mobile phone to the computer. Here we will take the Oppo Find X as the example to show you the easy and quick way to transfer photos between Android phones and computer.

OPPO Find X is the world’s first panoramic designed phone, embracing the beauty of nature into a leading technology product. OPPO Find X combines two seamless pieces of glass with the front screen featuring a gorgeous panoramic view. If you have an Oppo Find X and you took many pictures with it, but someday the mobile phone remind you that the storage space is not enough for new photos when you were taking pictures. Then you may notice you need to save them to other places, like computer. And since you've cleaned up all photos at one time, you may want to import some pictures also. In this article, we will share two different methods to help you transfer photos between computer and PC. In addition, you may be happy to know how to transfer photos from another phone to your new Oppo Find X.
Here give you some advice about how to transfer the photos between Oppo phones and computer in short time. Because we all do not want to waste too much time on these little things. Let's check every part one by one. You can jump to the part you prefer
You can connect phone to computer and find photos from one folder to another. Or alternatively, you can also use Syncios Mobile Manager for free to sync and transfer your picture files. You can manage, delete, edit, export and import photos, photo albums or even other data like contacts, messages, apps, music, videos easier with the help of this professional phone data manager.
Step 1 : Download and install this Syncios Mobile Manager on your windows PC. Then enable the USB debugging mode on Oppo Find X and connect it to computer as a media device after turning on the USB debugging mode properly. Any other detection issue, follow this tutorial step by step to fix.
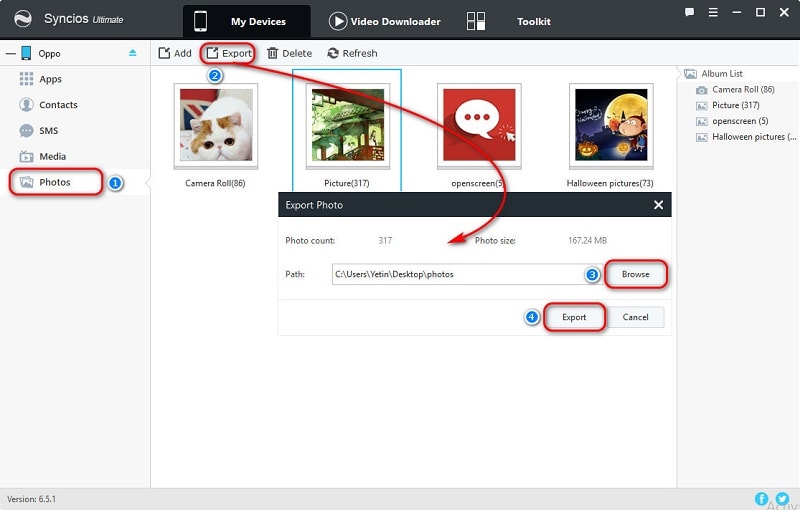
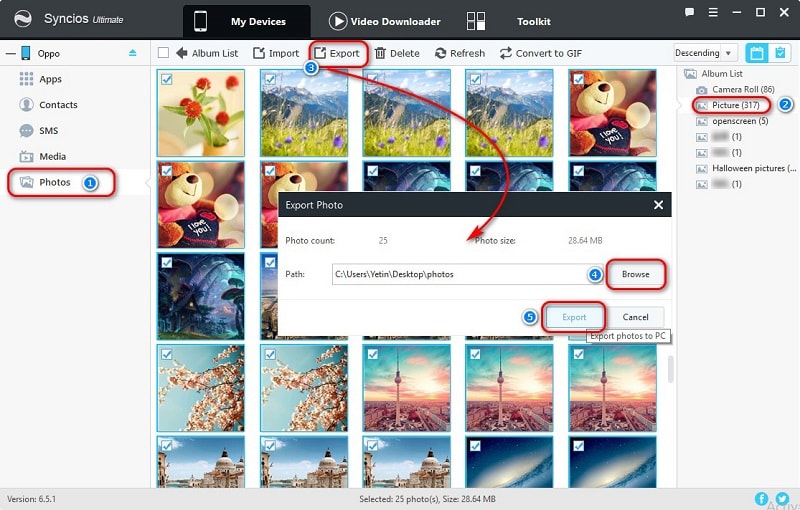
Step 2 : After connecting and data loading, on the navigation bar, click on Photos. All photos and pictures are displayed here. Select photos from any photo album or select a photo album at once, then click on Export to save photos to your computer.
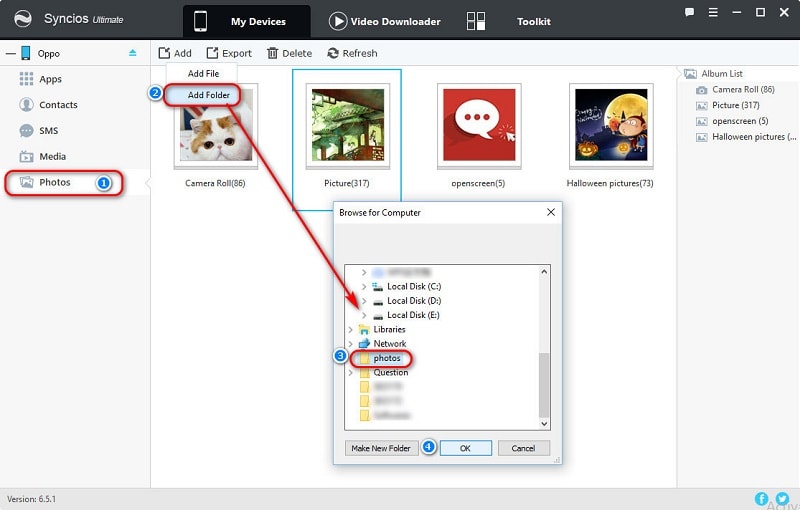
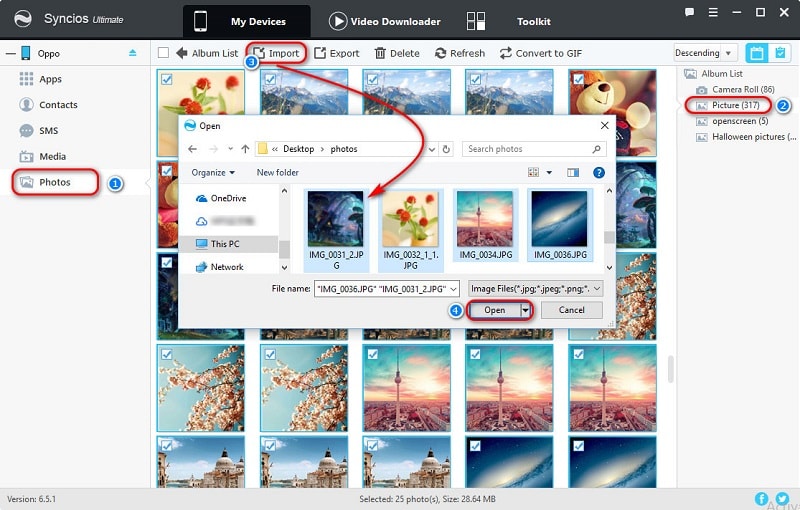
Step 3 : Simply, when you are going to import photos from computer to Oppo Find X, just navigate to Import/Add button on the menu bar. Then choose multiple photos from computer to a photo album with Ctrl/Shift. Or import a photo folder as a new photo album at once. Also, you are allowed to drag and drop photos to Oppo Find X directly. Have a try, you'll see.
Step 4 : When you view photos on computer, you may wonder why could drag and drop photos directly. It's so convenient. Actually, you are also allowed to drag and drop photos to Oppo Find X directly. Have a try, you'll see.
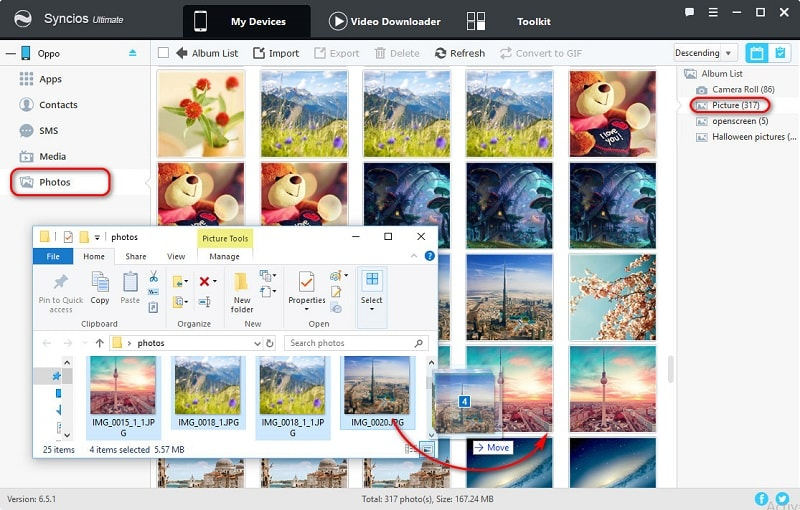
Tips: If you still be confused about how to export and import Oppo Find X photos on PC, you can have a try now since it will be much easier when you operate by yourself. Find Export/Backup to transfer phone data to computer and find Import/Add/Recover button to restore or import data from computer.
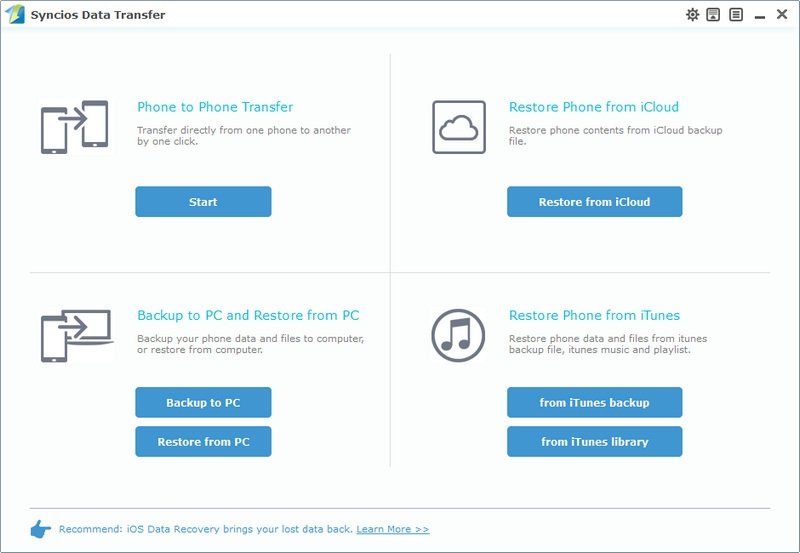
If you've carried out the first solution, you'll find things will be mush easier with the help of professional tool. Next, we go on to share another way to backup and restore Oppo Find X photos. In fact, you are also allowed to backup and restore other data like messages, contacts, call logs, music, videos, apps, bookmarks in this method. However, the data transferring we are talking about could not be finished well without the professional phone data transferring tool - Syncios Data Transfer. It's an all-in-one transfer tool, which means you are allowed to backup and restore phone data, transfer data from phone to phone, retrieve data from iTunes and iCloud backups with the assistance of this tool. Now, get to the point, let's learn how to backup and restore Vivo Nex photos or other data with one click.
Step 1 : All steps begin with the installation of Syncios Data Transfer. After installation on your computer, launch the program properly. And the USB debugging mode on your Oppo Find X should be enabled before connecting to computer. Connect your Oppo Find X via USB cable or Wi-Fi and keep your Oppo Find X unlocked when connecting in case any pop-up message appears.
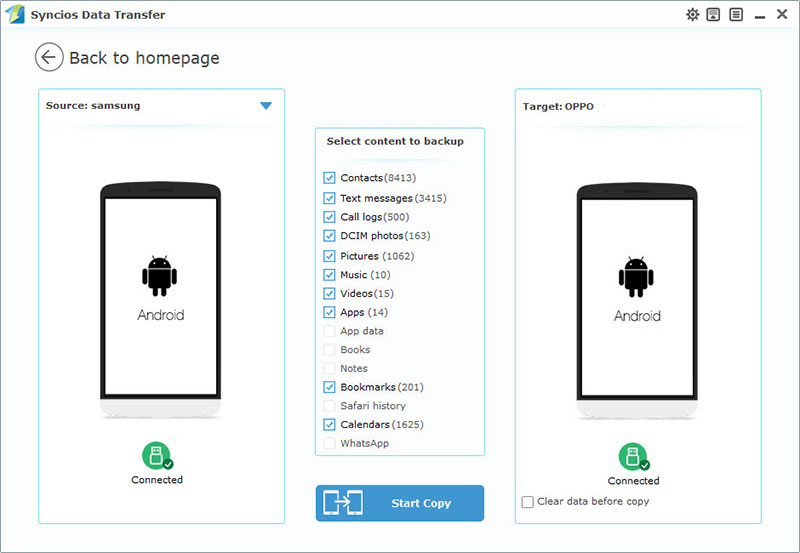
Step 2 : Four data transferring modes will be presented on the primary window. Go to 'Backup to PC and Restore from PC' mode and click on Backup to PC to save Oppo Find X data to computer firstly.
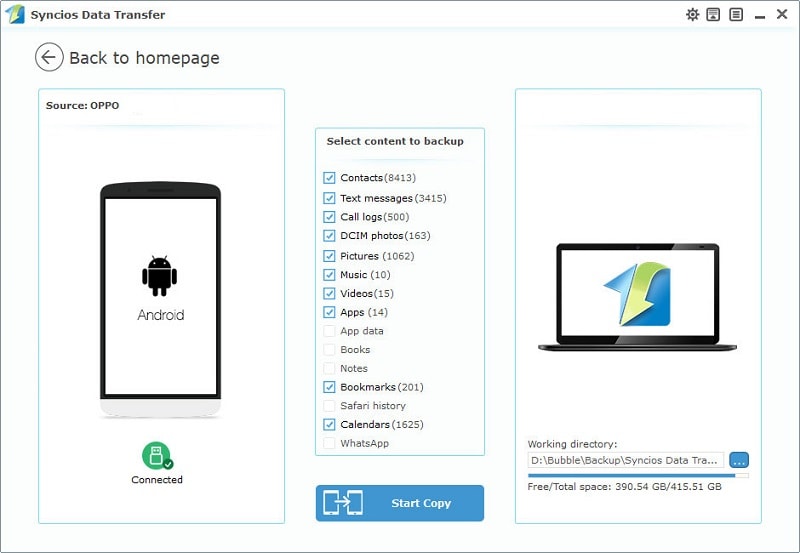
Step 3 : Syncios will load your data of Oppo Find X and list them on the middle box. After data loading, tick off DCIM Photos and Pictures. Then tap on Start Copy to transfer Oppo Find X photos and pictures to computer. If you need to save other contents, just tick off the check box behind them before transferring.
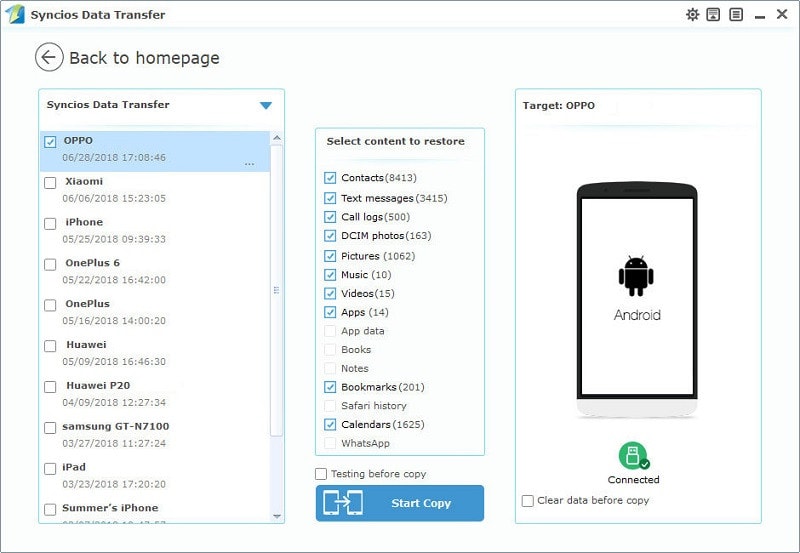
Step 4 : Since you've backed up Oppo Find X photos and pictures to computer, you may intend to restore them one day. Just tap on Restore from PC When you need to restore backups of photos to Oppo Find X. Syncios will detect all previous backups you've made automatically and list them on the left panel. Choose one backup from the left list, then tick off DCIM Photos and Pictures in the middle content box. Finally, click on Start Copy to restore backups to Oppo Find X.
You may wonder why we are talking about transferring photos from another phone to Oppo Find X since it has nothing to do with the topic. Indeed, it's not about the topic, but we guess you may need to transfer data from another phone when switching to the new Oppo Find X. So here we go to learn more.
Step 1 : Download and install Syncios Data Transfer on your computer if you haven't. Then launch it properly. When transferring data from another Android phone, you should also turn on the USB debugging mode on it before connecting to computer. If you are going to transferring data from iOS device, just click on Trust on the iOS device.
Step 2 : After all preparations, tap on the Start button under "Phone to Phone Transfer" in the primary interface. Syncios will load the data of the source device and list the data clearly on the middle box. The source device should be presented on the left panel and the Oppo Find X should be presented on the right panel. Find the Flip button to exchange their positions when need.
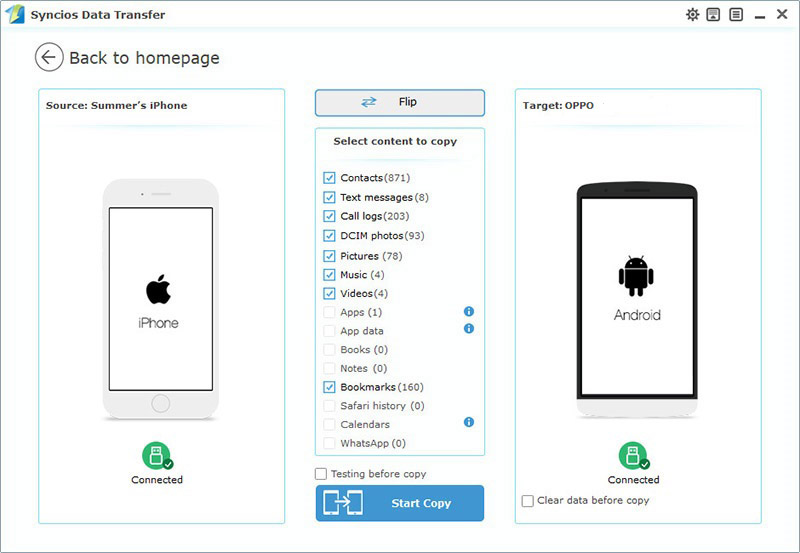
Step 3 : Select DCIM Photos and Pictures when you need to transfer photos, and tap on Start Copy to start the process. Wait with patience when data transferring. And keep both device are connected properly when transferring. If necessary, you could check the Clear data before copy on the lower right before transferring.
After reading those three parts, you may want to have a free try now with Syncios Mobile Manager or Syncios Data Transfer. Things will be clearer when you carry out step by step.