

 >
Android >
>
Android >
How to Transfer Photos between Computer and Samsung Galaxy S25/ S7 Edge
This summer is truly a visual feast to worldwide sports fans. Not long ago, The 2016 NBA Finals, The Eastern Conference champion Cleveland Cavaliers defeated the Western Conference champion Golden State Warriors with 4-3 in 7 amazing games, the win by the Cavaliers was the first-ever championship by the Cavaliers franchise. Not only did they win the first title since 1964, recover from a 3-1 deficit, but they also pulled one of the biggest upsets in NBA playoff history. Followed up by Portugal overcame France after extra time in the UEFA EURO 2016 final with 1-0. Besides, as we all know, in August, the Olympic Games held every four years will be started in Rio, which will be a grand event to all sports players and fans.
So you may take a lot of photos while at the game or in front of your computer live, whatever taking the photos of your favorite team, star, or even selfies. You know these pictures will take up large space of your phone, to save your space of your cell phone, what you should do is to sync the pictures with your computer. So here let me show you some methods in this article to help you make it, just take my Samsung Galaxy S25 and computer as example.

How to transfer/sync these pictures from your samsung with your computer
Method 1: Transfer Samsung Galaxy S25 photos to computer by using USB cable
This method could be very primary and may not be very cool. But sometimes the simplest way can be the most effective way.
Step 1: Connect Samsung Galaxy S25 to your computer via USB cable, and your computer will recognize it as a removable USB drive.
Step 2: Drag down Notifications panel from the top of your S7's screen, connect as "Media device(MTP)". Click "ok" when the "Allow USB debugging" popped out.
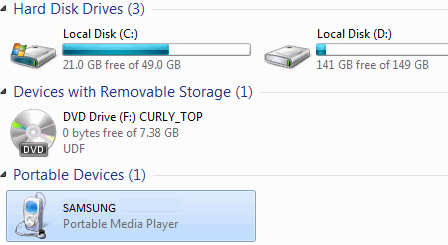
Step 3: Ensure Samsung Galaxy S25's drive installed successfully on your computer. Open the Portable Devices and find "DCIM", where all the photos saved.
Step 4: Select and copy the pictures what you want to transfer from your Samsung Galaxy S25 to your computer.
Method 2: Sync Samsung Galaxy S25 photos to computer via Syncios Manager
Syncios Manager is a free and helpful mobile manager application, which makes it easy to help you sync all types of files to your computer from your Samsung Galaxy S25, including photos, messages, call logs, videos, music and more. The biggest advantage of this approach is that with a visual interface, you are able to preview, edit, manage photos on computer, besides, you could choose and transfer certain picture from Samsung Galaxy S25 to PC. Tips as follow:
Step 1: Download and set up Syncios Samsung Manager on your computer, connect your Samsung Galaxy S25 to it. Make sure you have enabled "USB debugging mode". (Any detection issue, please follow our tutorial.
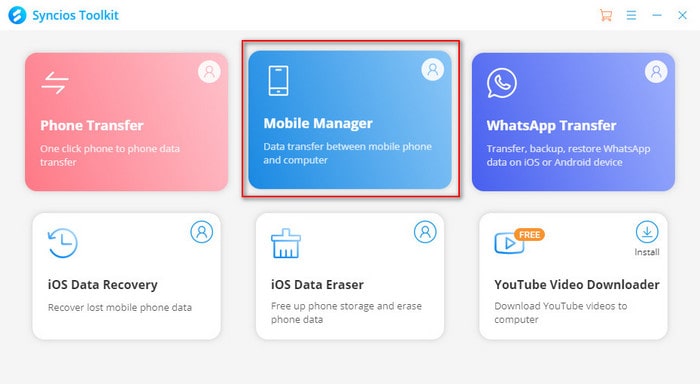
Step 2: Choose "Mobile Manager" on the main interface. After your Samsung Galaxy S25 is recognized by Syncios Android Manager, click on "Photos"
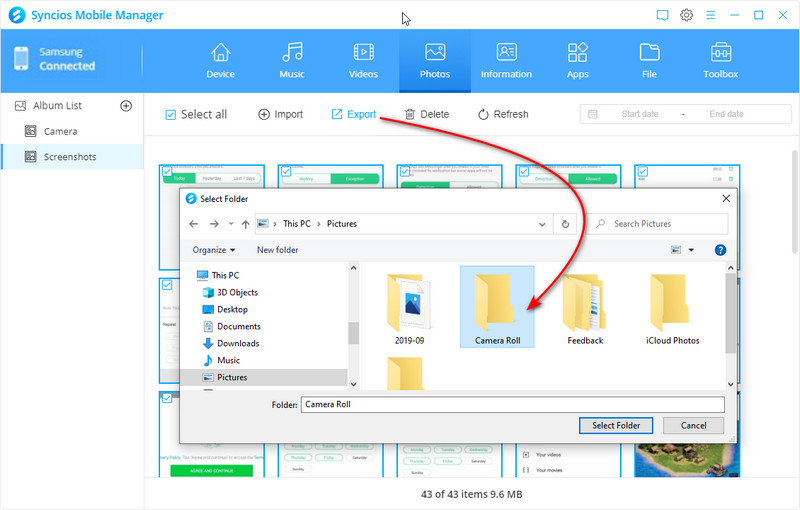
Step 3: Select the photo(s) you'd like to transfer to your computer, then click "Export" button to transfer photos to computer.
Step 4: Click on "Add"/"Import", you can also transfer photos from computer to your Samsung S7 device.
Method 3: Transfer all photos between Samsung Galaxy S25 and PC on one click
The final method could be the easiest and the best way to transfer your Samsung Galaxy S25 photos to computer, since Syncios Samsung Data Transfer only takes you ONE CLICK to backup all DCIM photos from your S7 to computer, finish its job even better than you expected. It supports backup more 12 kinds data from Samsung Android devices, including contacts, text messages, music, videos, photos, call logs, apps, calendars, etc. What's more, it enables you to restore iTunes backup files to Samsung Galaxy S25 as well, worth a try!
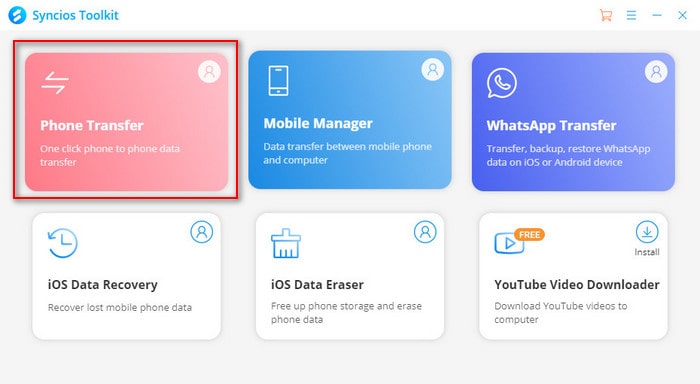
Step 1: Download and install Syncios Data Transfer on PC. And open "Phone Transfer" program on the main interface. Connect Samsung Galaxy S25 to it with USB cable. Make sure you have enabled "USB debugging mode". (Any detection issue, please follow our tutorial).
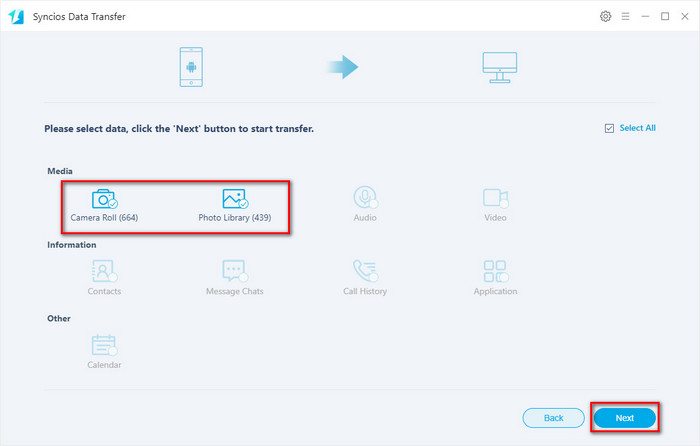
Step 2: Click on "Backup" from the homepage. Syncios will show you the backup list which you can choose data from.

Step 3: Tick off "Camera Roll" and "Photo Library" on the checkbox, then click on "Next" to start copy process, your photos will be transferred quickly to the computer.
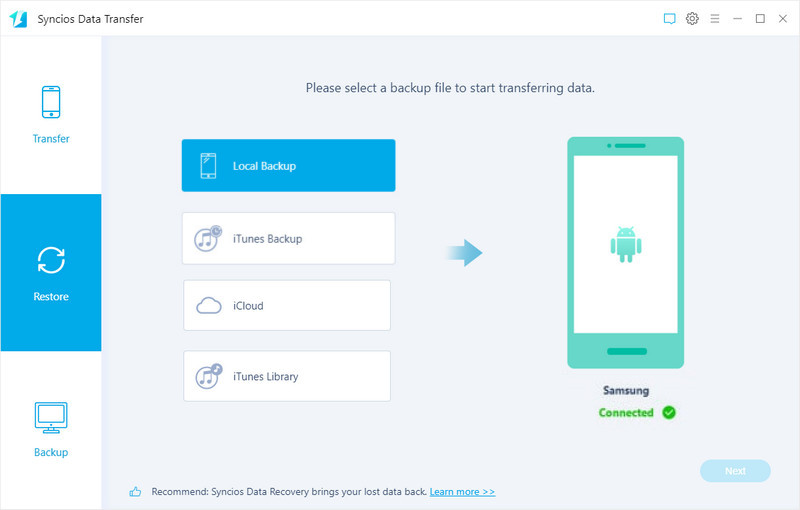
Step 4: You can restore the photo backup via Restore > Local Backup button on main interface. Choose the backup from the list, select the photos or other data you want to restore, then click "Next" to restore backup to Samsung Galaxy S25 or other devices.
This Samsung Transfer tool also allows you to directly transfer photo from phone to phone, or restore photo backup from iTunes backup to your Samsung Galaxy S25 without overwriting current data on your Samsung phone. Just have a try!
Conclusion
By reading this passage, you will clearly know the method of transferring photos between computer and Samsung Galaxy S25. Transfer photos by manual or with the help of third-party apps - Syncios Manager and Syncios Data Transfer, they all can achieve this goal.