


How to Backup and Restore iPhone 16/16 pro
Should we backup our new iPhone 16 in regular? Why? It’s better for us to form a good habit. If the running speed of your iPhone 16 becomes slow, iPhone 16 settings app is messed up, data lost after iOS system upgrade or any other possible occasions, you’ll have a copy of your important information from a backup file.
This article summarizes three methods for you to backup and restore iPhone 16. Move forward to the following steps.

Method 1. Selectively Backup and Restore iPhone 16 Messages/Contacts
Wish to selectively backup iPhone 16 messages or contacts, then restore back to phone when needed? Due to some limitations of iTunes, many users are seeking for ways to backup an iPhone without iTunes. Among various choices in the market, the free Syncios Manager is your best bet. It is always a user-friendly and highly-prized program that enables you to backup and restore your data selectively with just few clicks. Except for your iPhone messages and contacts, photos, videos, notes, bookmarks, Ebook and more can also be fully supported.
Step 1Download and Install Syncios Manager free version
Step 2Connect the iPhone to Computer
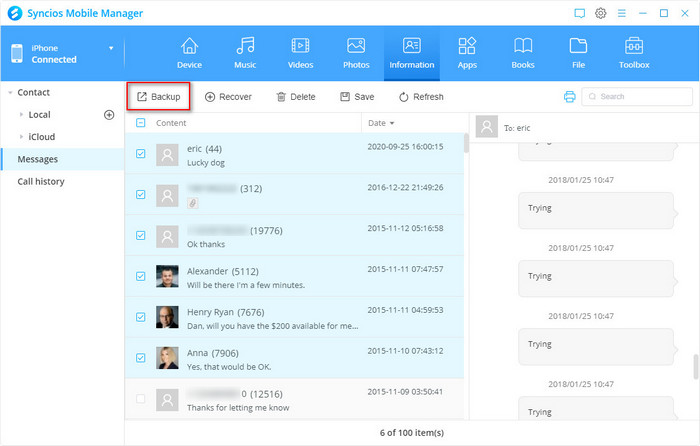
Connect the iPhone 16 to your computer via USB cable. Then you can Music, Videos, Photos, Information, Apps, Books, File and Toolbox on the interface. Hit on "Information" tab to load. Have thousands of data items on phone? Then it may take some time, wait for patience. Then to transfer contacts/messages, click on "Contacts/Messages" tab. The messages/contacts contents will be listed and you’re allowed to view one by one on the right hand toolbar. Select the messages/contacts items that you want to backup singly. Click on "Backup" button.
Step 3Restore Messages/Contacts to iPhone
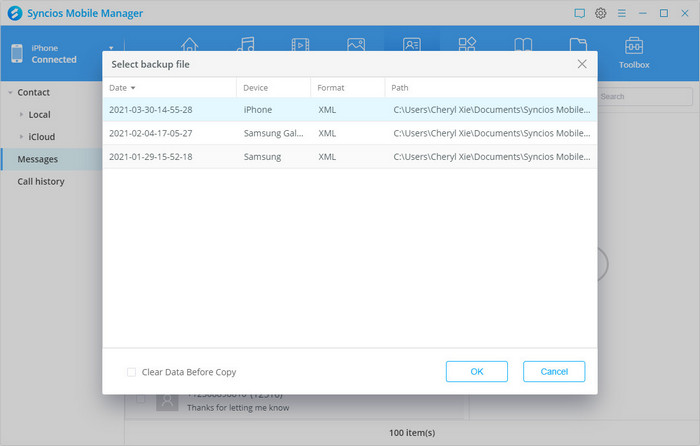
Go to "Messages" or "Contacts" section. Hit on "Restore" button to launch a new window. All local backup files with Syncios will listed here. Select one according to backup devices and dates. Click on "OK" to start transferring.
Method 2. One-Click Restore All Data to iPhone 16 from iTunes Backup
Being accustomed to backup your iPhone by iTunes? Do you know old iTunes backup will be overwritten by default? More narrowly, iTunes keeps only one backup file for each iOS device on your computer. What’s more, when you’re restoring data from iTunes backup, parts of the files might fail to retrieve, sometimes even all of the data.
In addition, you’re not allowed to selectively restore types of data you want from iTunes. For example, restore contacts and messages instead of retrieving everything in the backup. So, is there a prefect iTunes alternative, which includes but is not only limited to the capabilities of iTunes? The answer is yes. Syncios Data Transfer provides different restore modes for every iOS or Android user. You can restore iPhone data from local backup, iTunes backup and iCloud data, or transfer media files on iTunes library to iPhone/Android.
Step 1Run Syncios Data Transfer on Computer
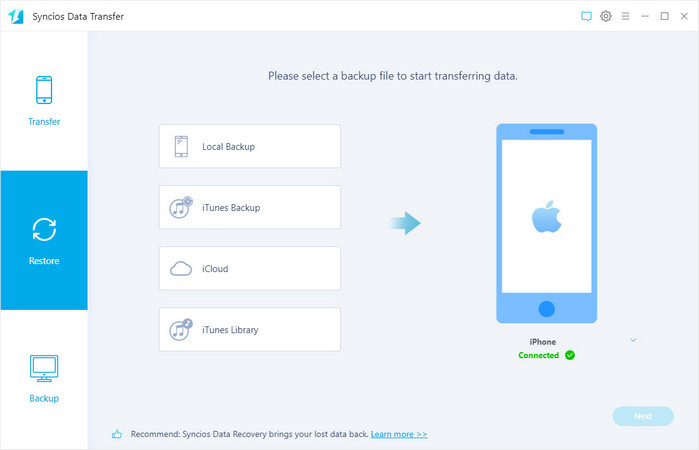
Choose a suitable version to download on your computer. Then run it. Connect iPhone 16 via USB cable. Go to "Restore" section. Select "iTunes Backup" option.
Step 2One-Click Restore iTunes Backup to iPhone 16
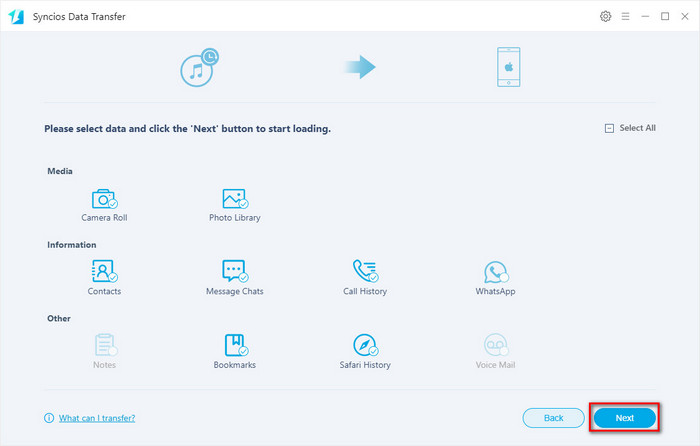
Once you click on the button, Syncios program will automatically pop up a smaller window which lists all available iTunes backup files you’ve done before with the computer. Select one file and click on "Next" to load. Then the page will show you the types of data that Syncios can support to restore. To restore all things, need no more operations, just click on "Next" button for twice, then tap on "OK" to start the process. If you want a selective backup, uncheck "Select All", and tick the desired options off, next, do the same thing again as situation 1.
 You can also learn from a video tutorial:
Method 3. Backup and Restore iPhone 16 data via iCloud
Except for the two methods above, you can also backup and restore iPhone 16 via iCloud. Since it’s the built-in feature on every iOS device, it should be easier to access to some extent. But you should know that once you decide to use iCloud to restore your wanted data, you’re supposed to erase everything on your iPhone 16 in advance.
If your only has 5GB free iCloud storage space, then you can only restore the backed up data to iPhone and meanwhile, original data would be overwritten. If you don't mind, continue to read the steps below, otherwise, go to Method 1 or 2
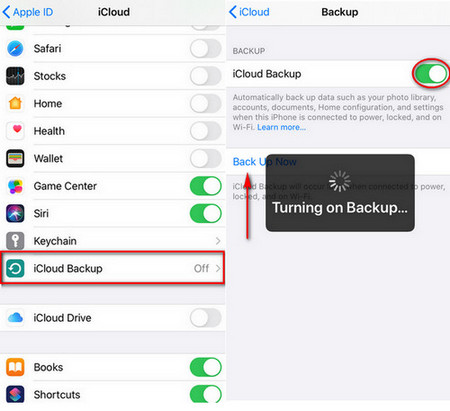
Step 1Backup iPhone 16 with iCloud
Unlock your iPhone 16, go to Settings app. In the Settings page, open [Your name] (such as Summer Home) > iCloud > iCloud Backup. Turn on the iCloud Backup button. Then click on Backup Up Now. When completely the backup process, back to the last page to view the size of your data backed up on iCloud. You can choose the types of data as your need. For example, don’t want to sync iPhone Safari, notes and Mail with iCloud, then turn these button off manually.
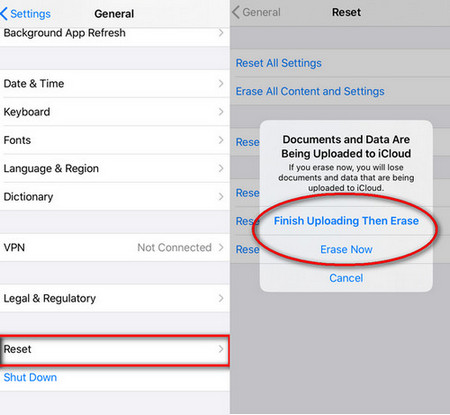
Step 2Erase and Restore iPhone 16 with iCloud
In order to restore data from iCloud backup, also in the Settings page, go to General > Reset. Then click on Erase All Content and Settings option. Attention! Now you will receive a prompt informing you to update iCloud backup or directly begin the erasing process. So if the latest backup doesn’t include all data you want, then you need to create a new backup. So tap on Backup Then Erase option. But if you have a recent backup, click on Erase Now.
Conclusion
Reach the end you’ve known how to backup and restore your iPhone 16. Select one suitable for you. To backup iPhone 16 data selectively, for example, just wish to backup parts of your contacts, Syncios Manager is your good choice. To backup or restore all of the data in a click, you should install Syncios Data Transfer. It can also support to restore data from iTunes backup. Certainly, if you don’t mind to erase your iPhone data before restoring something, iCloud is also available.

