Syncios iOS & Android Manager


Transfer Photos/Videos between iPhone 12(Pro) and Windows PC/Mac
For transferring photos and videos between iPhone and PC, you don't need any special software. You even don't need iTunes. A USB cable can accomplish this job perfectly. But for some users, who need to export films and import photos and videos to iPhone, it's a trouble. You are in the right place. Follow this guide, we will share ways to transfer photos and videos between iPhone 12 and computer.

- Solution 1: Transfer Photos and Videos from iPhone 12 to PC Via USB Connection
- Solution 2: 1-Click to Transfer Photos and Videos from iPhone 12 and PC
- Part 1. Transfer Photos between iPhone 12 and Computer
- Part 2. Transfer Camera Videos/Films/Downloaded Videos between iPhone 12 and Computer
- Video Tutorial - Simply Transfer Photos between iPhone 12 and PC
Solution 1: Transfer Photos and Videos from iPhone 12 to PC Via USB Connection
The most common way is to transfer photos and videos from an iOS device by using File Explorer or Windows Explorer. But we could transfer all photos we need. And the films and other videos could not be transferred. And it's annoying that we could not import any files to the iOS device from computer. To fix this issue, we prepare solution 2. But firstly, let's learn how to simply transfer your photos and camera videos from iPhone 12 to computer.
Step 1: Connect iPhone 12 to PC
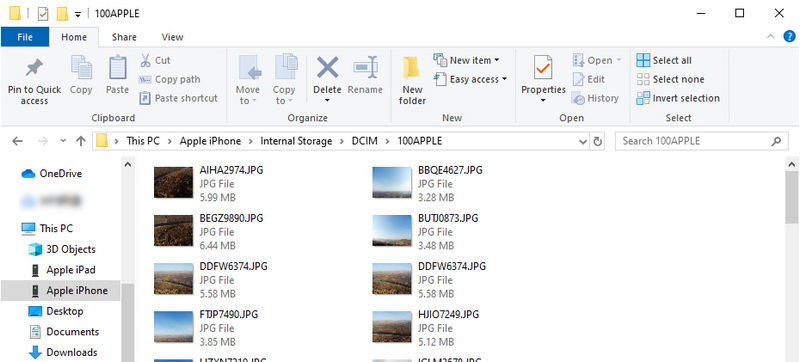
Connect your iPhone 12 to your computer using the included Lightning-to-USB cable. Unlock your iPhone and wait for a message that asks you to trust your computer. Choose Trust to give the permission. Then you can go to This PC and find the connected device in File Explorer.
Step 2: Copy iPhone 12 Photos and Videos to Computer
Double click the iPhone device. Only an Internal Storage folder will be displayed. Open it to enter its DCIM folder to find photos and videos in a 100APPLE folder. If you have lots of photos and videos, you’ll see additional folders named 101APPLE, 102APPLE, and so on. If you use iCloud to store photos, you’ll also see folders named 100Cloud, 101Cloud, and so on. Then choose photos you need and copy them to your computer.
Extra Tips: What is the HEIF (or HEIC) Image Format?
If you take photos using the HEIF image format, you can find .HEIC photos. It needs a third-party app to view these files on computer. If you want to disable HEIF on your iPhone to save space, you can go to Settings > Photos and scroll down to tap Automatic under Transfer to Mac or PC. Your iPhone automatically converts the photos to .JPEG files when you import them to a PC. If you select "Keep Originals" instead, your iPhone will give you the original .HEIC files.
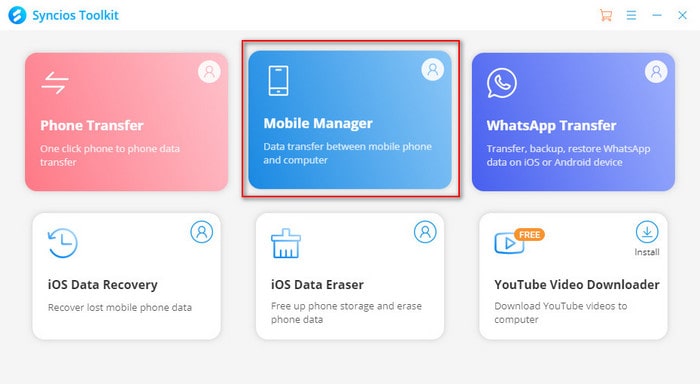
Solution 2: 1-Click to Transfer Photos and Videos from iPhone 12 and PC
The best way we are going to share for transferring data between iPhone 12 and computer. You can follow this method no matter you are using Windows PC and or Macbook. A free mobile manager will be recommended here. Syncios Mobile Manager could be helpful whenever you need to manage, edit, backup and restore phone data.

Syncios Mobile Manager
- Support to transfer, edit, backup, manage, view mobile data such as contacts, apps, photos, music, ringtone, videos, SMS messages, eBooks and more.
- Help to organize every iOS device's/Android's file.
- Handy tools: One-Click Backup/Restore, HEIC Converter, Photo Compression, Ringtone Maker.
- Fully compatible with latest Android and iOS devices.
Part 1. Transfer Photos between iPhone 12 and Computer
Step 1: Connect iPhone 12 to Computer
Download and install Syncios on your computer. And open "Mobile Manager" program on the main interface. Then run this program and connect your iPhone 12 to computer. Unlock your phone to "Trust" this computer before any further action.
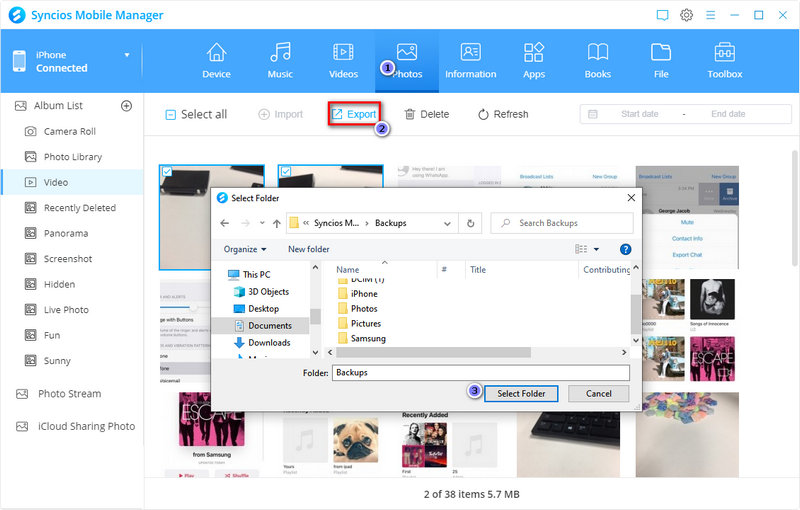
Step 2: Export iPhone Photos and A Photo Album to Computer
Navigate to menu bar. You will get all categories of iPhone data. photos, photo albums, songs, voice memos, ringtones, videos, contacts, call histories, messages, ebooks, are categorized here. To export iPhone photos to computer, go to Photos, and select a photo album then click Export. Tap Browse to choose a proper saving path.

If you only need to save some photos from certain album, open that photo album and choose photos you need, then click Export to save these selected photos to computer.

😎 Tips:
- 🌱 1. Choose a photo then press "Ctrl" key to choose multiple photos one by one. Or tick off the check box on the upper left of each photo to select multiple photos.
- 🌱 2. Tap the first desired photo then press "Shift" key, then tap the last photo to get all photos between the first one and the last one selected. If you want to deselect some photos after all photos selected, press "Ctrl" to deselect them.
- 🌱 3. All photos are organized by date, tick off the check box of date to get all photos in that month selected.
- 🌱 4. Above all photos, tick off the check box near "Album List" on the menu bar, you can select all photos in this opened photo album at once.
- 🌱 5. If you could not export some photos, check if you have closed "iCloud Photo Library". Or other problems, please check this tutorial.
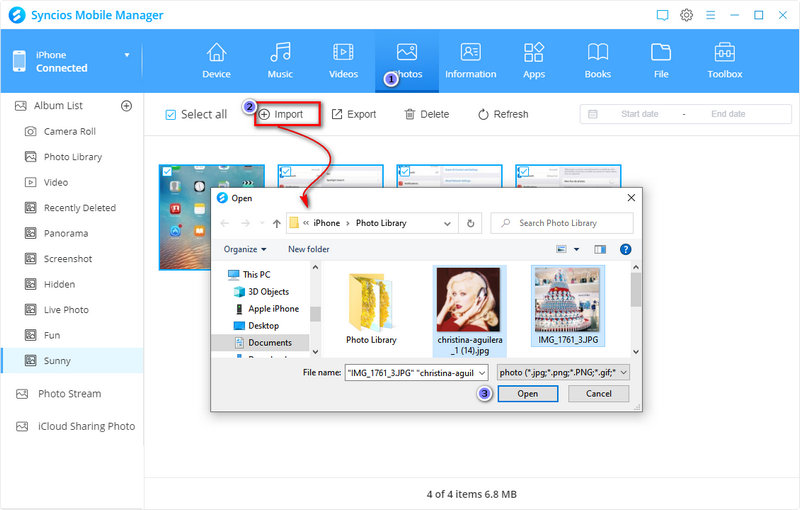
Step 3: Import Photos and Photo Album to Computer
Click Import button from the album list interface. Then you can choose a photo folder from computer the import this photo folder as a new photo album on your iPhone 12.
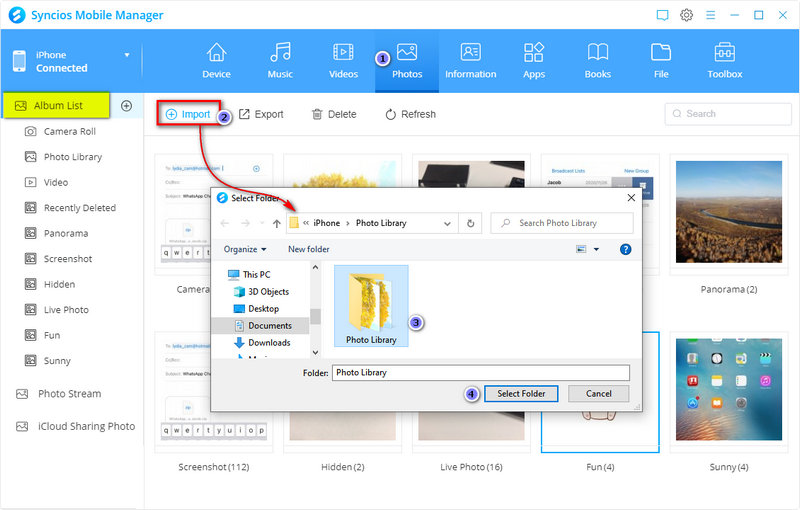
If you need to import photos to certain existed photo album, open it then tap Import to choose photos from computer.
😎 Tips:
- 🌱 1. Choose a photo then press "Ctrl" key to choose multiple photos one by one. Or tick off the check box on the upper left of each photo to select multiple photos.
- 🌱 2. Tap the first desired photo then press "Shift" key, then tap the last photo to get all photos between the first one and the last one selected. If you want to deselect some photos after all photos selected, press "Ctrl" to deselect them.
- 🌱 3. You could not import photos to some albums, including "Camera Roll", "Panorama", "Screenshot", "Live Photo". Because those albums are created by your iPhone and when you taking photos by using the phone camera, those photos are categorized to those albums automatically. So you can import photos to other photo albums or create a new photo album.
Part 2. Transfer Camera Videos/Films/Downloaded Videos between iPhone 12 and Computer
Step 1: Export iPhone 12 Video to Computer
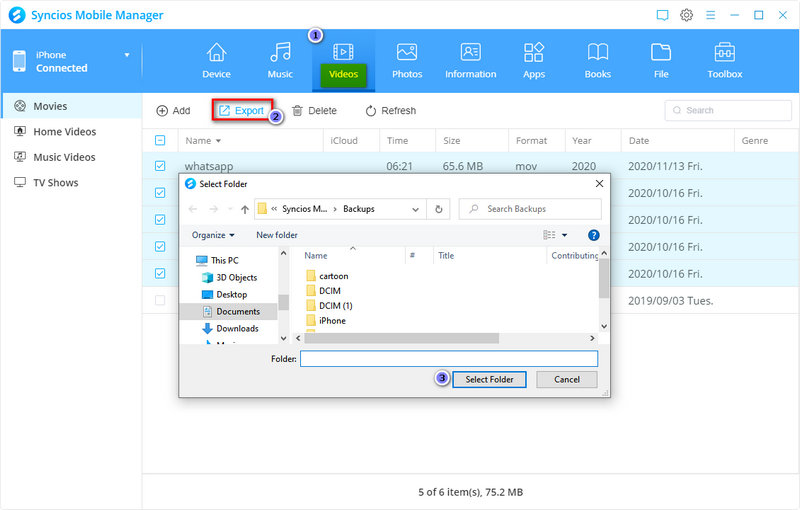
Go to Photos tab then open Video album. Choose videos taken by your camera then click Export to save videos to computer.
Go to Video tab on the content bar. You can find all films and other downloaded videos here. Choose videos you need then click Export. Choose a proper saving path then export.
How to Free Download Online Videos >>
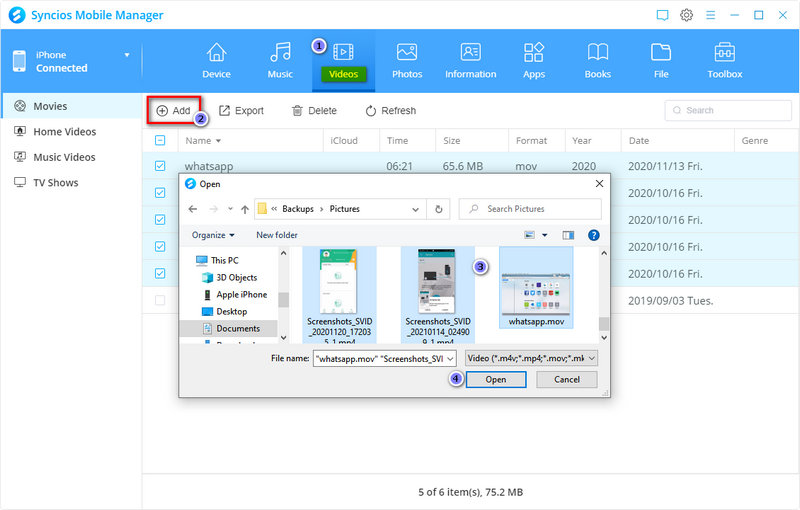
Step 2: Import Videos to iPhone 16 from Computer
You could not import videos to "Photos > Video album". As we mentioned before, you could not import photos or videos to photo album created by iPhone originally. But you can go to Video, then click Import to choose videos from computer and import to your iPhone.

Video Tutorial - Simply Transfer Photos from iPhone to PC
Conclusion
Get help from this article you can find two pratical ways to transfer photos and videos between iPhone 12 and PC. But if you need to save time, you can give Syncios Mobile Manager a free try now. It features an intuitive interface and will provide a one-click transfer solution for media files. If this guide helps, please share it with your friends.