

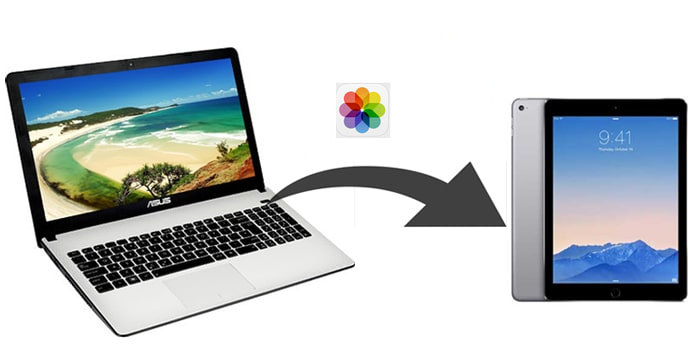
How to Transfer Photos from PC to iPad with and without iTunes
"How do I transfer my photos from PC to iPad easily? I can’t transfer all my photos from my Windows PC to iPad. Any suggestions? Thanks."
Transferring photos from a PC or laptop to an iPad is easy when you know how - and even you don't need to use the dreaded iTunes either. In this article, we will walk you through five easy ways about how to transfer your photos from Windows PC to iPad with and without iTunes.
- Way 1: Transfer Photos from PC to iPad with iTunes
- Way 2: Transfer Photos from PC to iPad Without iTunes
- Video Tutorial - Transfer Photos from PC to iPad
- Way 3: Import Photos from PC to iPad with iCloud
- Way 4: Transfer Pictures from PC to iPad with Google Photos
- Way 5: Transfer Pictures from computer to iPhone via Google Drive
Way 1: Transfer Photos from PC to iPad with iTunes
You can use iTunes to transfer photos to the iPad from the computer, but it will remove all existing photos saved on iPad Photo Library. To use this method, first, you are required to sync your iPad with iTunes not iCloud. Remember to turn off iCloud Photos on your iPad if it is on. Anyway, below is a step-by-step tutorial.
Step 1 Connect your iPad to the computer with a USB cable. Please just run iTunes if it doesn't open automatically.
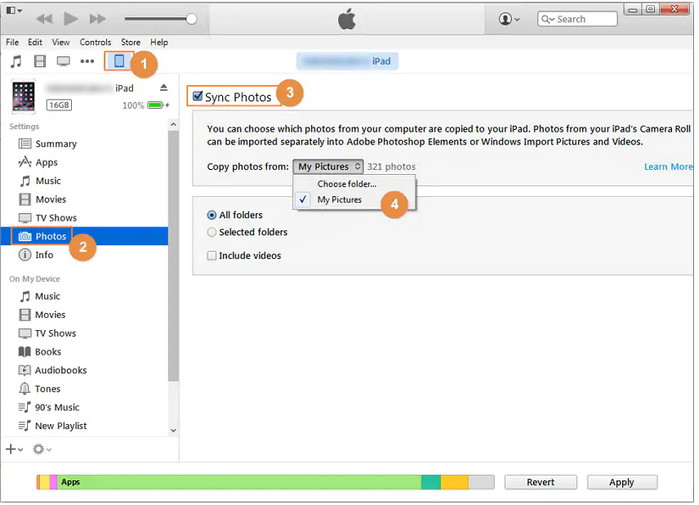
Step 2 Click the Device tab and select Photos.
Step 3 Head over to the Photos section under Settings in the left pane and then check the box right next to Sync Photos, then select the photos you want to transfer from the Copy photos from option.
Step 4 Click Apply to start syncing photos to your iPad from the computer.
Step 5 Now, iTunes will initiate the syncing process and start backing up data on your iPhone first. Depending on the photo count and device storage, it’ll take a few minutes to complete the sync. Please wait patiently.
Step 6After the syncing process is completed, if you head over to the Photos app on your iPad, you’ll be able to access all the photos you chose to sync.
😣 You will only be able to sync one folder at any time. If you change the folder later, your previous images will be erased.
😣 The operation will erase all the images previously stored in Photo Library (your Camera Roll photos will stay intact).
😣 Images in the Photo Library can only be changed or deleted from the PC, and iTunes won’t let you delete the images separately – only do a full resync. To be able to create and edit the content of albums inside the Photo Library, you can use the Syncios Mobile Manager.
😣 The sync will not be automatic anyway. You will need to relaunch it every time you need to introduce changes.
Way 2: Transfer Photos from PC to iPad Without iTunes
As we mentioned above, syncing photos from PC to iPad via iTunes will get your current photos on the iPad replaced by the newly synced photos. So, here we put a non-iTunes way. A third-party tool - Syncios Mobile Manager is highly recommended. It is a reliable tool for you to transfer certain pictures or photo folders from PC to iPad easily and effortlessly. Additionally, it empowers you to create new albums to save imported photos. Besides, it helps you to transfer other important data like music, videos from computer to iPad.
Key features of Syncios Mobile Manager:
- Selectively backup and restore contacts, messages, call logs, music, video, photo, eBooks, Apps, etc.
- Manage iOS devices/Android music, edit song details and deduplicate tracks.
- Preview and export SMS, Call History & Contacts to readable format on computer.
- Handy tools: One-Click Backup/Restore, HEIC Converter, Photo Compression, Ringtone Maker, Audio Converter and Video Converter.


Steps to transfer certain photos or photo folders from PC to iPad
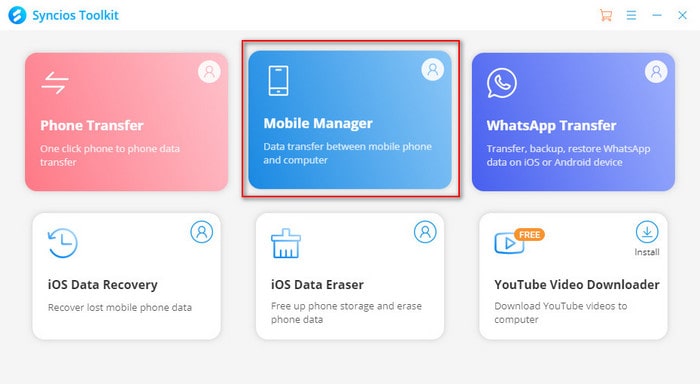
Step 1 Download and install the proper version of the program from the above download button. Run Syncios Mobile Manager by clicking on the Mobile Manager on the main interface of Syncios Toolkit.
Step 2 Connect your iPad to the computer with a USB cable.
Click here to get help if you met some problems during the connection process.
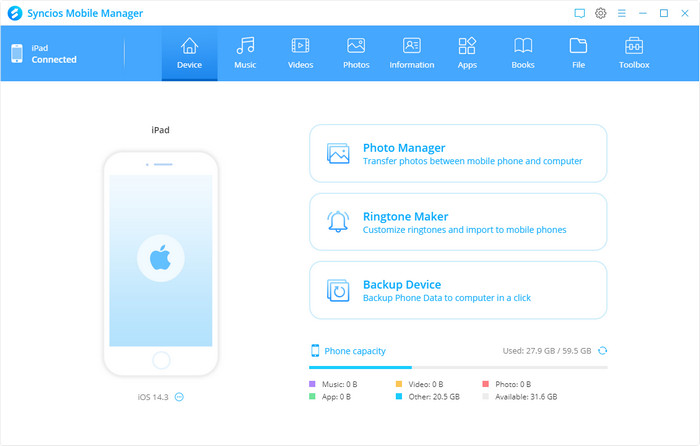
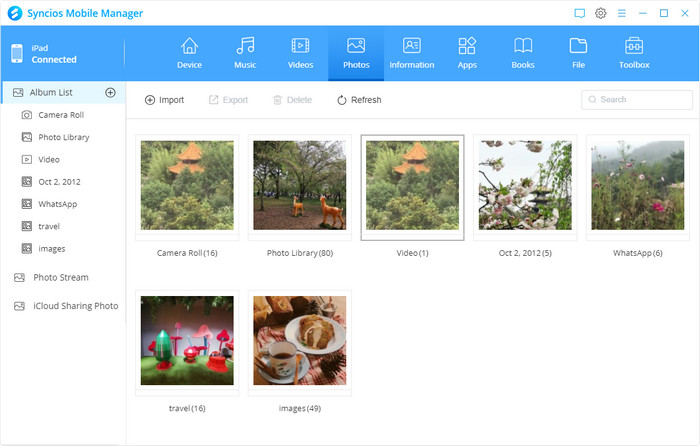
Step 3 Navigate to the Photos option on the top menu bar. Then all photo albums on your iPad will be displayed on the main window.
Step 4 Start transferring certain photos or the photo album from the PC to your iPad.
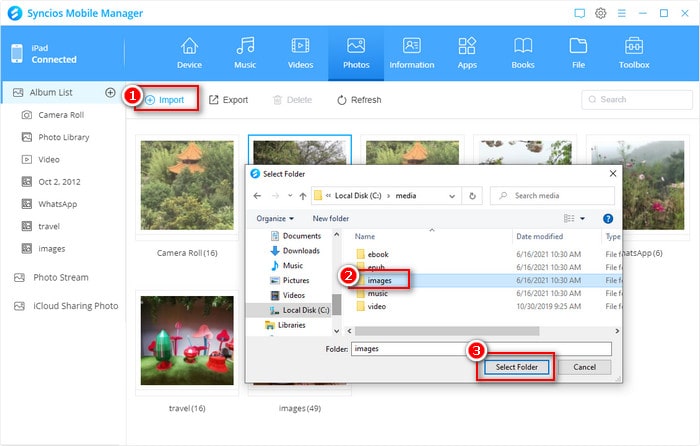
Transfer the photo album from your PC to iPad.
You do not need to open an album in this part. Simply directly click on the Import button to choose one or more albums from your PC to transfer to your iPad.
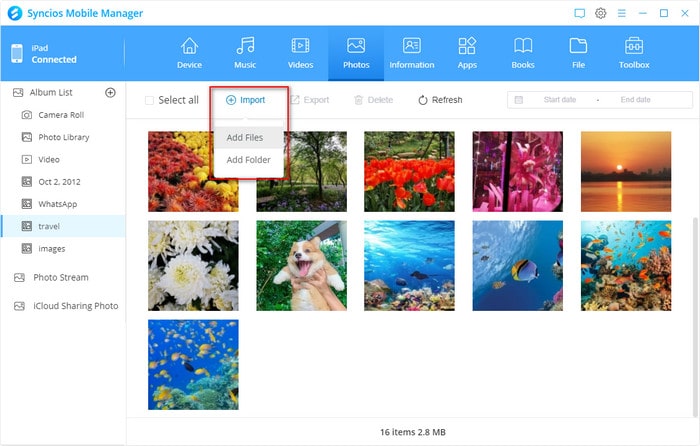
Transfer specific photos from your PC to iPad.
Simply double-click a certain album from the Album list on the left-hand of the interface and select the Import option. From the drop-down list, select the Add Files option.
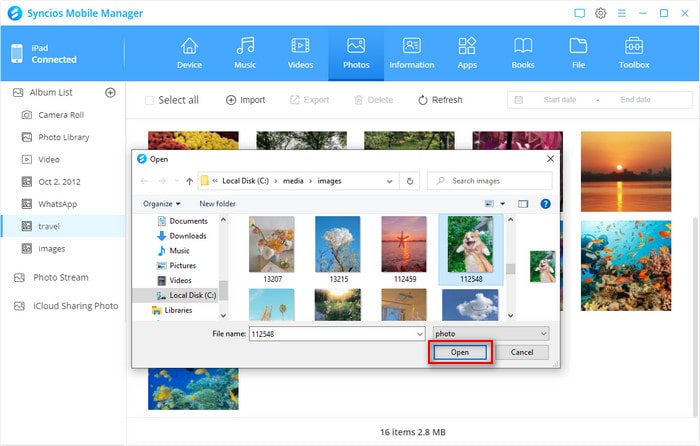
Then browse and select the photos you need to transfer. Click on the Open option to start transferring the selected photos from PC to iPad.
Step 5 Wait for a while till the transferring process finishes. Then you can preview the imported photos on your iPad.
Video Tutorial - Transfer Photos from PC to iPad
Way 3: Import Photos from PC to iPad with iCloud
If you want to copy photos from a Windows PC to iPad, then iCloud can help you with ease. There are two options for you: the first one is to use iCloud.com, the second one is to use the iCloud app for Windows. Now, let's get started.
Option 1: Via iCloud.com.
If you don't want to install iCloud for Windows, you can upload the photos to iCloud from iCloud.com instead.
Step 1 Firstly, go to Settings > [your name] > iCloud > Photos. Turn on the toggle switch next to Photos.
Step 2 Go to iCloud.com and sign in with your Apple credentials. Click Photos. Click the cloud icon with an arrow. Select photos from your computer. You can press CTRL + A to select all photos in a folder. Wait until the process is finished. It depends on your internet speed to upload all your photos to iCloud.
Step 3 On your iPad, Go to Settings > [your name]. Tap iCloud, then tap Photos. Select Download and Keep Originals. Wait until the iPad completing the photo syncing process.
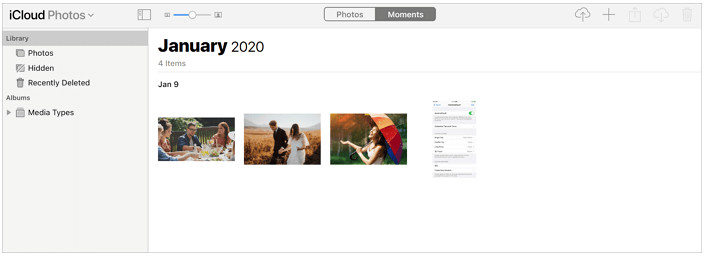
☛ Once the photos have been uploaded to your iCloud Photo library, they should soon appear within the Photos app on your iPhone (as long as iCloud is enabled and it's connected to Wi-Fi).
☛ It’s worth noting that photos will be displayed in chronological order, so if you add photos that were taken in January, you’ll have to scroll back to January to find them.
The latter option is to transfer photos on your computer to the iPad via the iCloud app.
Option 2: Import photos from PC to iPad via the iCloud app for Windows.
With the iCloud app, you can transfer your photos between your PC and iPad.
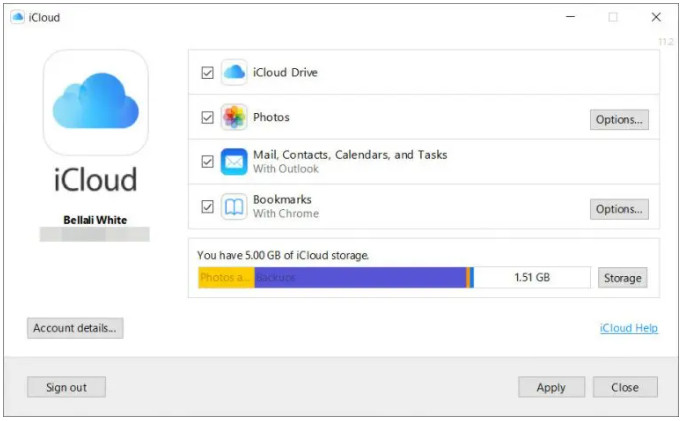
Step 1 Go to Microsoft Store to download and install the iCloud app. Sign in with your Apple ID credentials. Remember to enter the same iCloud authentication ID as your iPad.
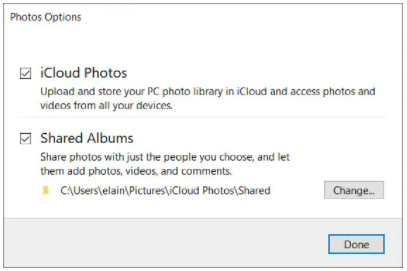
Step 2 Open iCloud for Windows. Next to Photos, click Options. Select iCloud Photos. Click Done, then click Apply.
Step 3Turn on Photos on iCloud on your iPad. (Go to Settings > [your name] > iCloud > Photos, and turn on the toggle switch next to it.)
Step 4 Click Upload Photos on iCloud for Windows app, and choose the photos or folders that you’d like to transfer on your PC.
Wait for a while. And make sure your iPad is charged, connected to a Wi-Fi network, and the screen locked. Finally, you can view your imported photos on your iPad.
Way 4: Transfer Pictures from PC to iPad with Google Photos
If you store your photos in the cloud, but prefer to use Google Photos instead of iCloud, you can still transfer pictures from PC to your iPad. Google Photos is another free online data storage service that allows you to sync your photos across different PCs, tablets, and mobile phones.
☛ It only offers 15 GB of free storage, which means you have to upgrade your storage plan if you have more than 15GB of photos to transfer.
Step 1 Download and install Google Photos to your iPad from the App Store.
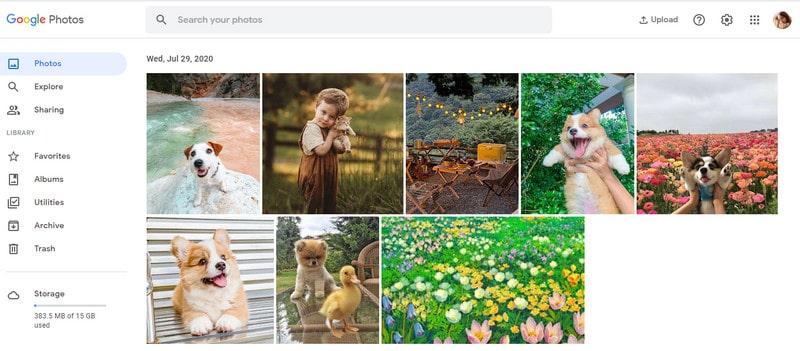
Step 2 Visit Google Photos on your PC and sign in with your Google account.
Step 3 Click UPLOAD, select the photos you'd like to copy from PC to your iPad, then choose the Upload size in the pop-up window and click CONTINUE.
Step 4 Click ADD TO ALBUM and select/create an album to save the pictures.
Step 5 Open Google Photos on your iPad and tap on the hamburger button > Collections. Find and choose the album that contains the pictures you want to move to your iPad. Click the ellipsis icon and choose Select.
Step 6 Make sure the photos you want to transfer from PC to your iPad are selected and tap on the share button. Choose Save [number] Images to download photos to your iPad. After that, you can check the images in the Photos app.
Way 5: Transfer Pictures from computer to iPhone via Google Drive
Google Drive is also a good choice to share photos from PC to iPad. If you have a Google account, you are automatically eligible for 15Gb of free storage on Google Drive.
Step 1 Download the official Google Drive app on your computer and your iPad.
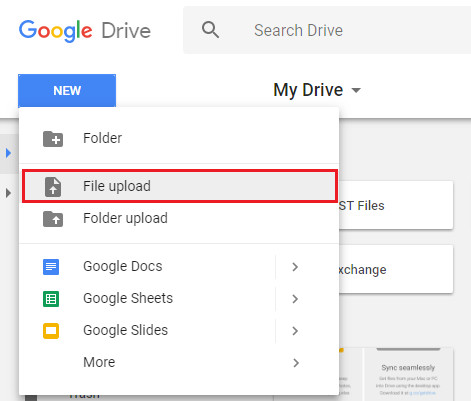
Step 2 Once you run Google Drive on your PC, tap the New button. Choose the File upload or Folder option to upload files or folders.
Step 3 After uploading you can see the files on your Drive account immediately.
Step 4 Open the Google Drive on your iPad, log in with the required credentials. Then you can see the synced pictures from your computer in the Google Drive account.
Conclusion
That’s all. These are the five common ways to transfer photos from PC to iPad. If you want to import photos from PC to your iPad wirelessly, using storage services like Google Photos, Google Drive, iCloud could fulfill your needs perfectly. If you prefer to copy photos from PC to iPad using a USB cable, Syncios Mobile Manager is the best solution. You can use Syncios Mobile Manager to transfer photo albums or specific photos from PC to iPad in simple steps. Moreover, Syncios Mobile Manager can help you manage your photos, such as editing, creating, renaming or deleting iPad albums on the computer.
Tips what's next? Download Syncios Mobile Manager now!

Syncios Location Changer
One-click to spoof iPhone location and simulate GPS movement. Learn more >>

Syncios Passcode Unlocker
Remove iPhone passcode, Face ID, Apple ID, Screen Time passcode. Learn more >>
Syncios D-Savior
Recover all types of data from HDDs, USB drives, SD cards, SSDs, etc. Learn more >>
Related Channels
Unlock Phones
- Turn Off Screen Time on iPhone/Mac
- Turn Off Screen Lock on iPhone in Seconds
- Unlock iPhone without Passcode Instantly
- Change Screen Time Passcode Without Code
- Unlock iPhone without Apple ID
- How to Unlock Disabled iPhone
- How to Remove Screen Lock on iPhone
- [Solved] Forgot Screen Time Passcode
- 14 Ways to Solve Face ID Not Working
Data Recovery
- SD Card Recovery: Recover Data from SD Card
- How to Remove Recycle Bin from Desktop
- Recover Deleted/Unsaved/Overwritten Excel
- Windows 10/11 Startup Folder
- How to Format SD Card to FAT32
- Recover Deleted Files from USB Flash Drive
- Stop Windows from Upgrading to Windows 11
- 10 Best Data Recovery Software for Windows
- 9 Methods to Recover Deleted Chrome History
- How to Recover Deleted Photos