


How to Use Syncios D-Savior
Download PDF User Guide

How to Register Syncios D-Savior
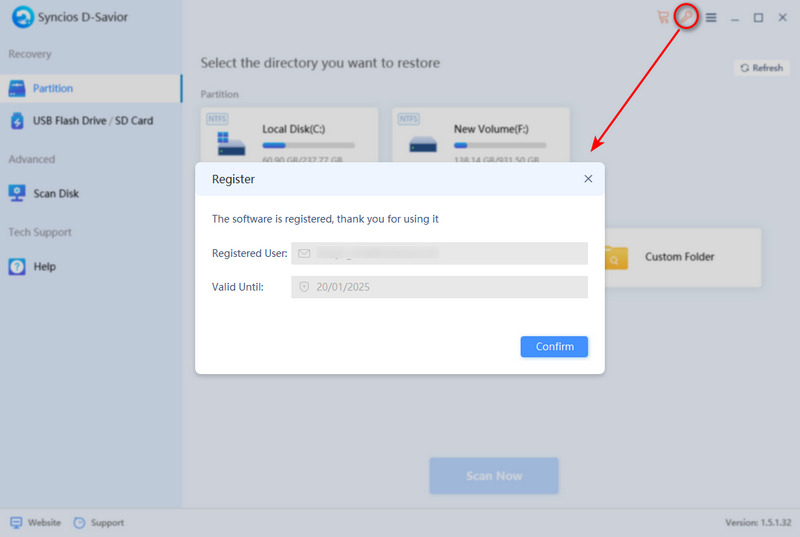
Step 1: On the startup interface of Syncios D-Savior, click the "Key" button. Instead, click the "menu" ![]() button and choose "Register".
button and choose "Register".
Step 2: Enter your license key and complete the registration and click "Confirm".
To verify if the program has been successfully registered, go to "Menu > Register" and check the registration status.
How to Recover Partition/Recycle Bin/Custom Folder
When your computer's partition gets damaged and data is lost, partition recovery is an ideal choice. It showcases all the partitions on your computer like a well-organized menu, allowing you to pick and choose which one to scan and restore. This targeted approach not only boosts efficiency but also keeps your data pristine and untouched. Syncios D-Savior excels in scanning and recovering various partitions, the Recycle Bin, Desktop, and even Custom Folders.
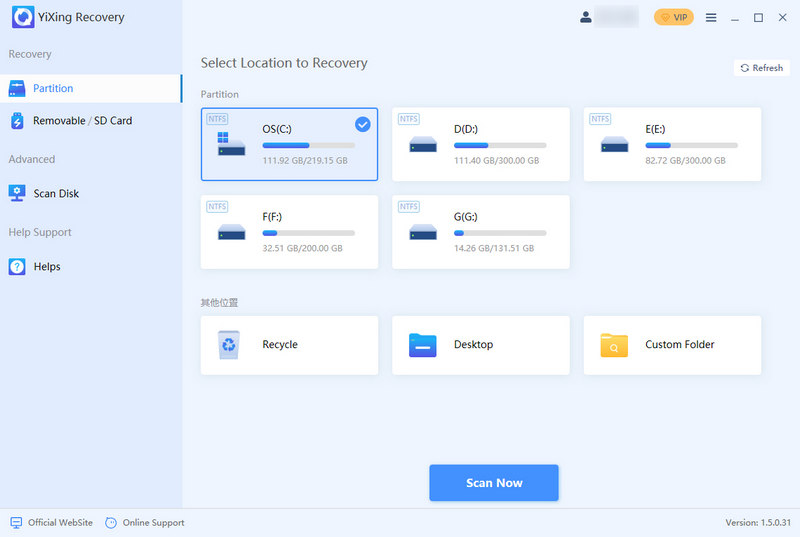
Step 1: Select A Partition to Scan
Start Syncios D-Savior and behold its main interface, where all your computer's connected hard drives and their partitions are neatly displayed. Quick access to Recycle Bin, Desktop, and Custom Folders lets you pinpoint where you need to restore. Simply tick the partition you're after and hit "Scan Now". Syncios will dive into its contents without delay.
Step 2: Deep Scanning Partition Data
The "Quick Scan" will wrap up in no time, revealing some data snippets. But hang tight, it's just warming up for a "Deep Scan" of every recoverable bit. How long it takes depends on the partition's size and data complexity, but the progress bar keeps you in the loop.

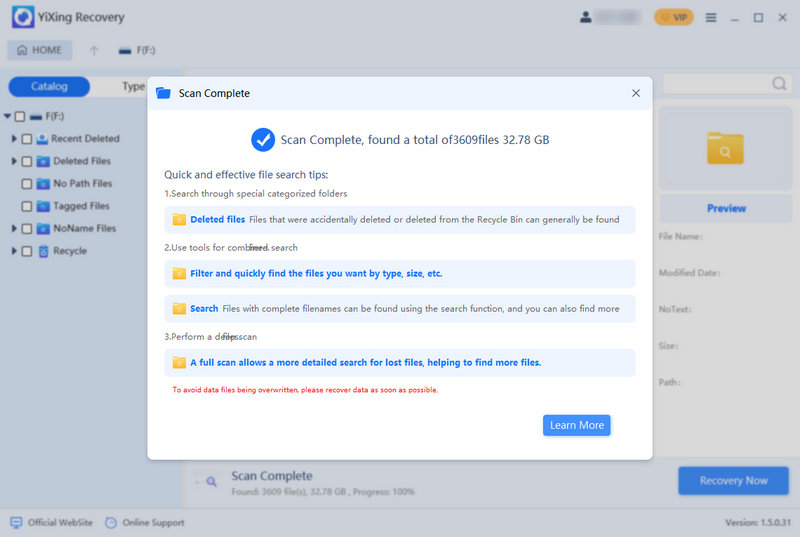
Step 3: Partition Scan Complete
Once the scan wraps up, a notification pops up, and your files are categorized neatly.
Step 4: Select Files to Recover from Partition
Scan results are organized by "Catalog". Peruse the file list, using File Name, Modified Date, Sizes, Type, and Path to zero in on your lost treasures.
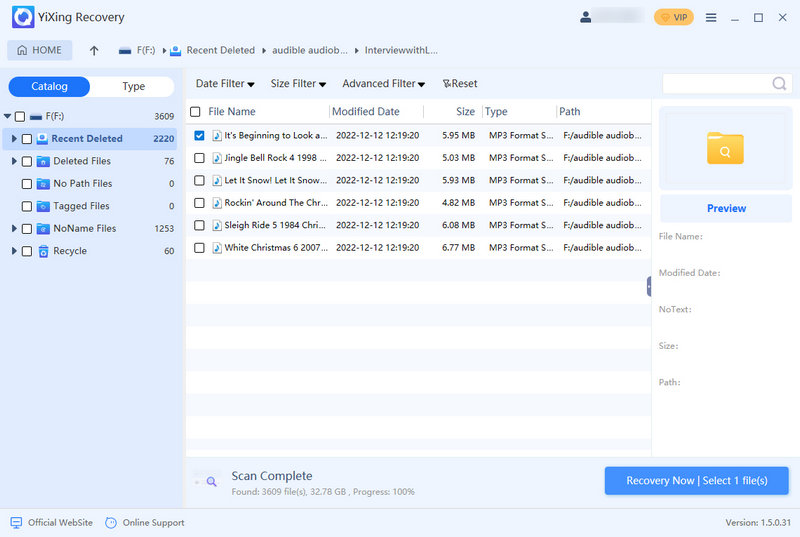
Alternatively, switch to "Type" sorting – Camera, Image, Document, Audio, Video, Archive, Program, and Others" – to locate your files by type.
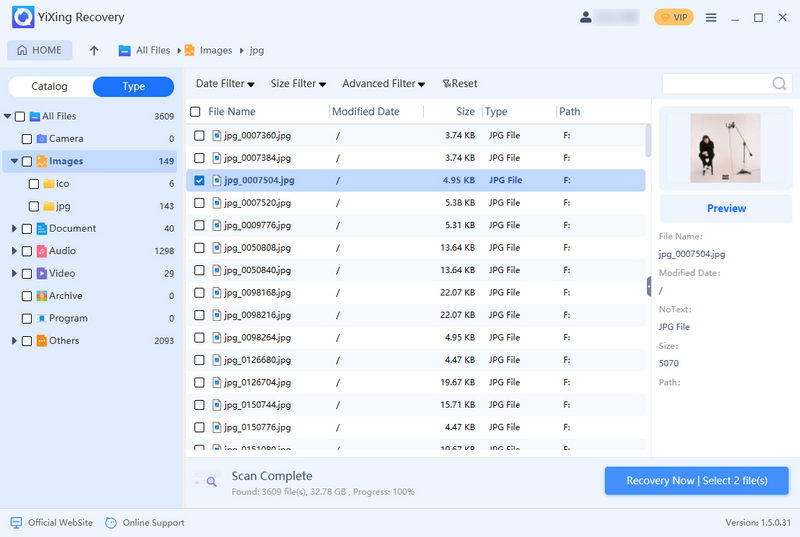
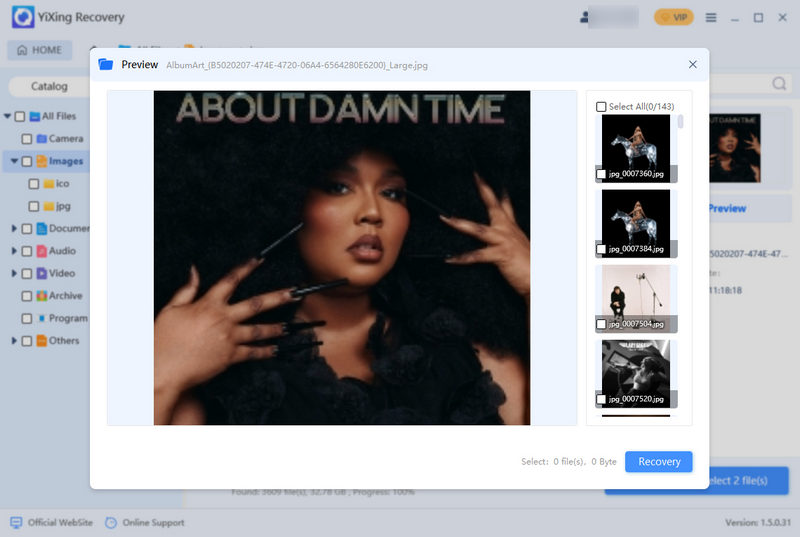
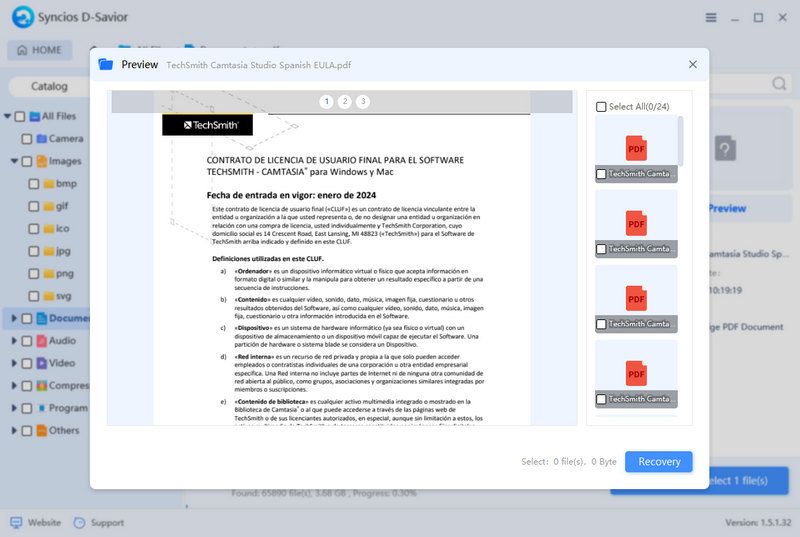
Step 5: Preview Files Before Recovery
Hover over any file and click the "Preview" button on the right to get a sneak peek. This ensures you recover exactly what you need.
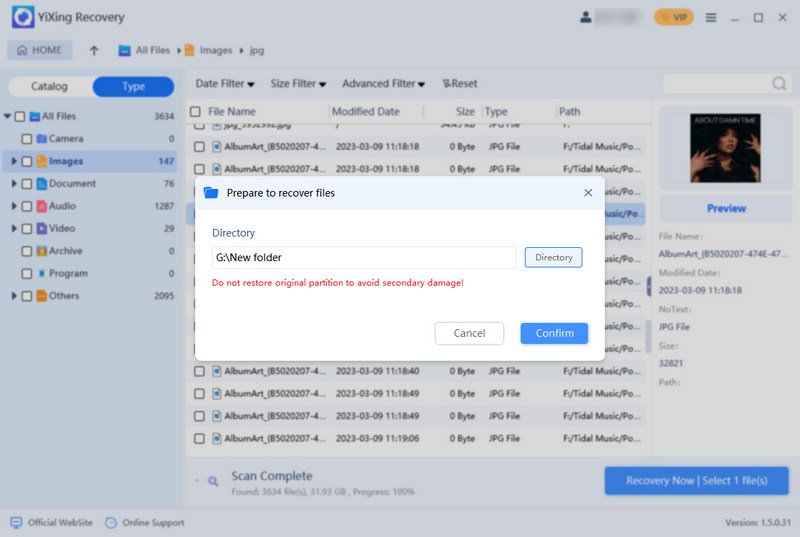
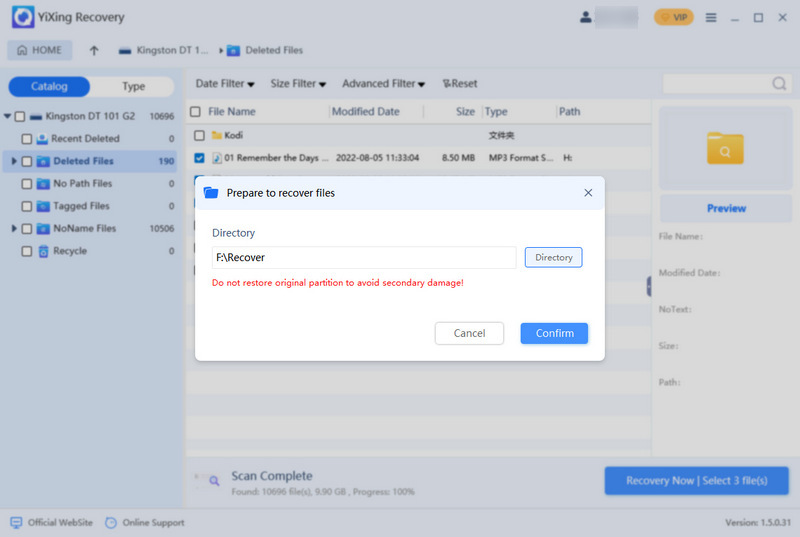
Step 6: Start Recovering Data from Partition
Before recovery, click the "Directory" button to pick a safe spot. A different hard drive or partition from the source to steer clear of data overwriting or corruption. Recovering to removable devices is available. Click "Recovery Now" to initiate the transfer from the target partition to your chosen destination.
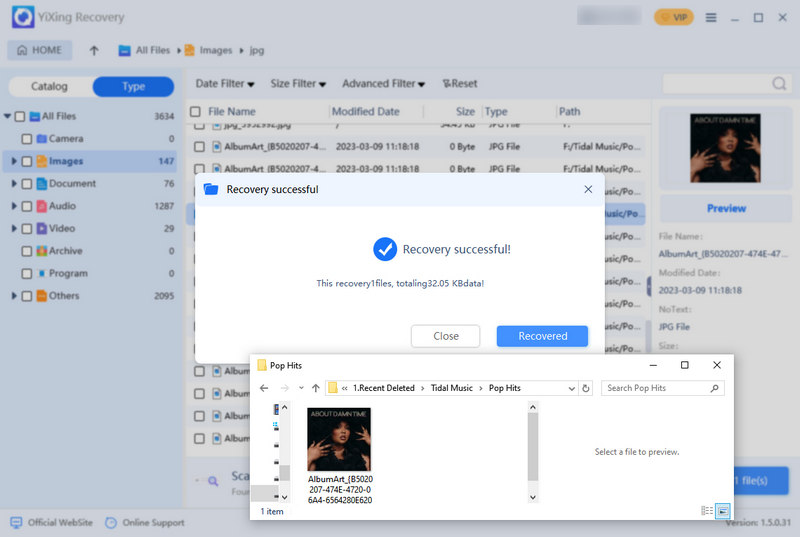
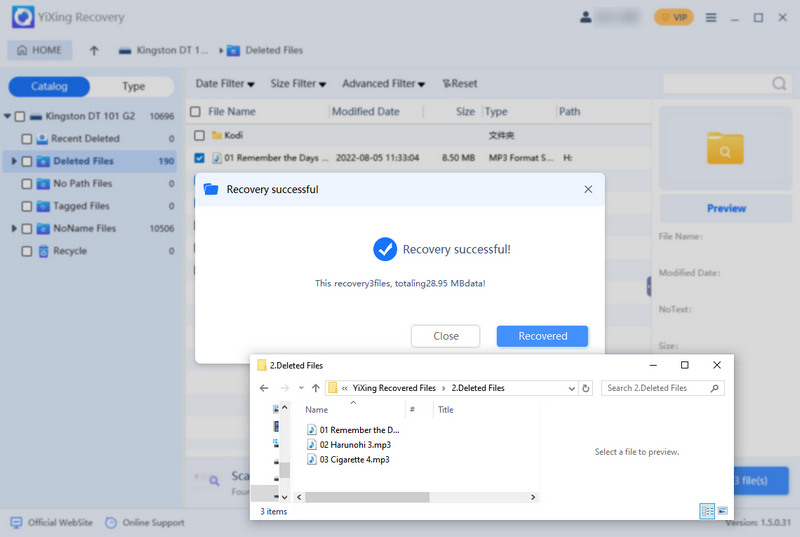
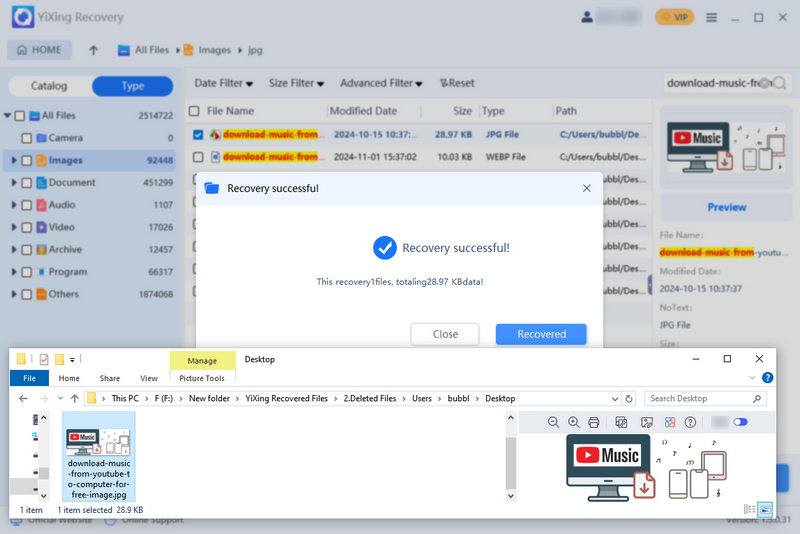
Step 7: Check the Recovered Files on PC
When the recovery is done, navigate to your chosen location and give your files a once-over. Ensure they're intact, accurate, and damage-free.
How to Recover Removable Devices
Rescuing data from removable devices—like USB flash drives, external hard drives, SD cards, and memory sticks—is all about bringing back lost or deleted files from these portable storage gadgets. As soon as you notice data missing, hit the brakes on any writing activities to the device. New data could swoop in and overwrite the old, slimming down your chances of a successful recovery. So, acting swiftly to retrieve your data is absolutely crucial.
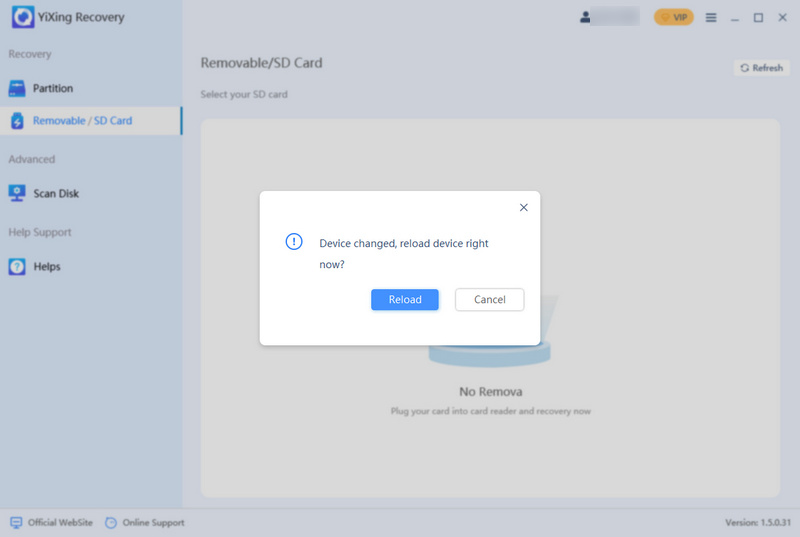
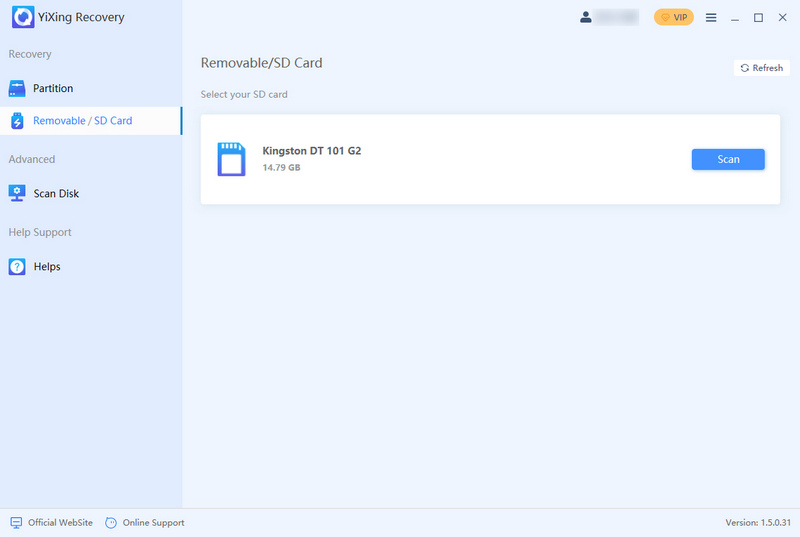
Step 1: Select A External Drive to Scan
Plug in your external devices like USBs, SD cards, cameras, MP3 players, or video players, and Syncios D-Savior will spring into action, instantly detecting them and asking if you want to load their data. Give it the green light, and it'll whip out your device's contents in no time.
Step 2: Deep Scanning External Drive
Hit that "Scan" button, and let the magic begin as it scans through all the data on your connected device.
Step 3: Select Files to Recover
Once the scan is done, dive into the "Catalog" section and tick off the files you need rescuing.
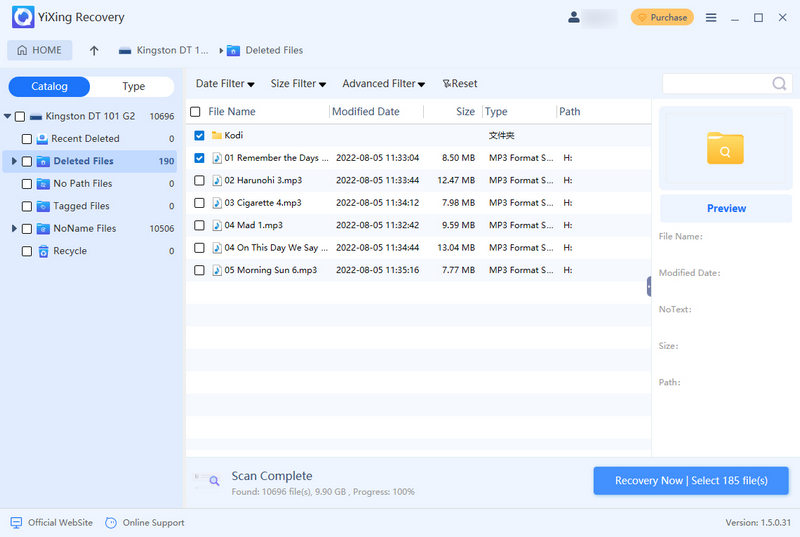
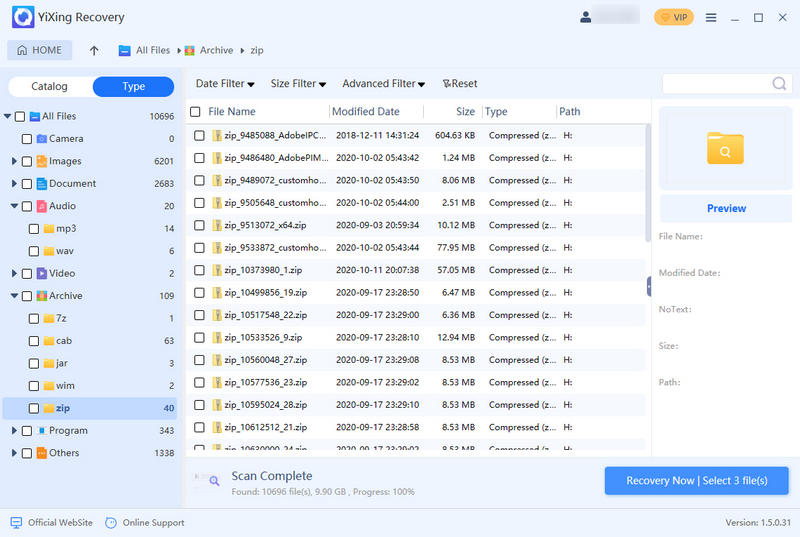
You can also switch to "Type" mode for a file-type-based treasure hunt of your lost data.
Step 4: Start Recovering Data
Once you've ticked all the boxes, click "Recovery Now", pick a cozy spot on your drive, and start bringing your chosen files back to life.
Step 5: Check the Recovered Files on PC
When the recovery is a wrap, head over to the storage spot you picked earlier to greet your newly retrieved data with open arms.
How to Scan Disk and Recover Data
Hard drive recovery comes in handy when your entire hard drive is in distress or you've lost precious data, perhaps due to a hard drive failure or a system meltdown. This process entails a thorough scan and analysis of the entire drive, capable of reviving data from all partitions, even if partition info has vanished into thin air.
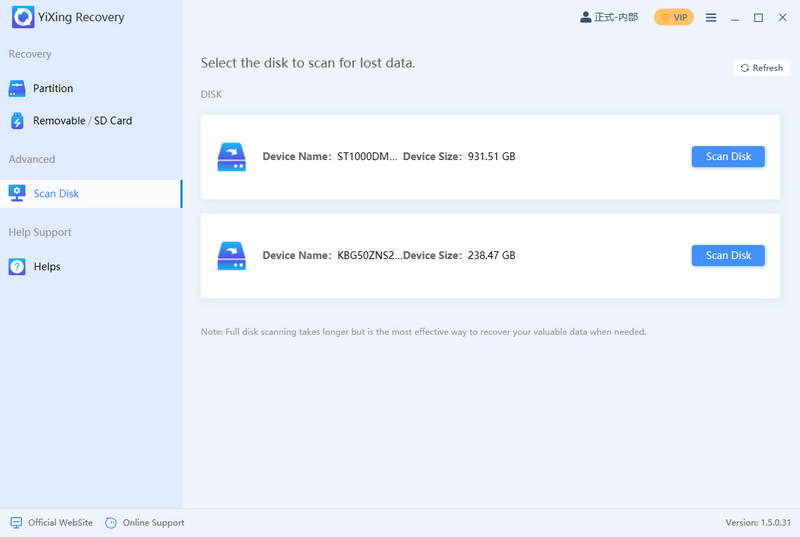
Step 1: Select A Disk to Scan
Pick the disk you need to recover by spotting its name and size. Hit that "Scan Disk" button.
Step 2: Select Files to Recover from Disk
Disk recovery is a comprehensive task that involves scanning a lot of data, so it usually takes some time. Once the scan is wrapped up, dive into the "Catalog" folder list and locate the files you're yearning for.
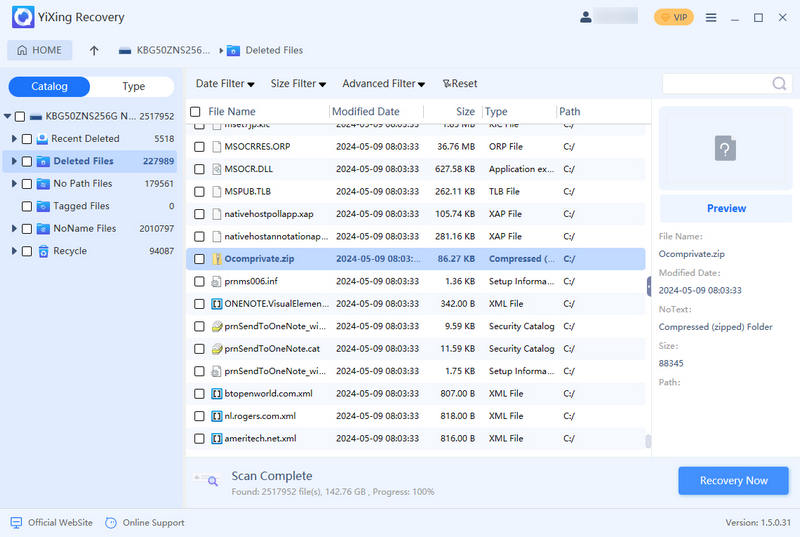
Alternatively, you can use the "Type" filter to pinpoint the files you need. After finding them, simply tick the boxes and click "Recovery Now" to kickstart the data retrieval.
Step 3: Check the Recovered Files
Your recovered data will pop up in the folder you designated. Take a peek to see if they've returned in their original glory. And the original file paths will also be preserved.
Tips: What's next? Download Syncios D-Savior now!

Syncios Location Changer
One-click to spoof iPhone location and simulate GPS movement. Learn more >>
Syncios Passcode Unlocker
Remove iPhone passcode, Face ID, Apple ID, Screen Time passcode. Learn more >>
Syncios Mobile Manager
Manage all media files and apps on iOS and Android devices. Learn more >>

Syncios Data Transfer
Selectively Backup, Restore and Transfer iOS and Android Data. Learn more >>
FAQ
- 1. Is it reliable to use Syncios D-Savior to recover lost data?
- 2. What types of files can Syncios D-Savior recover?
- 3. How long does it usually take to scan for lost files?
- 4. What is the success rate of Syncios D-Savior in recovering files?
- 5. How to avoid overwriting lost data?
- 6. Can I recover data directly to the original disk?
- 7. Why does the scanned file capacity sometimes appear larger than the actual disk?
- 8. Can Syncios D-Savior recognize data on mobile phones?
- 9. Why can't the recovered file be opened or is garbled?
- 10. Why are some photos damaged or incomplete after recovery?
- 11. Why are the recovered file names different from the original file names?
- 12. Why can't some files be previewed?
- 13. Can I recover data from a formatted disk?
- 14. What if I have more questions?
Guide & Tips
- 10 Best Data Recovery Software for Windows
- How to Format SD Card to FAT32
- 12 Ways to Recover Deleted /Unsaved/Overwritten Excel Files
- How to Recover Deleted Photos
- How to Remove Recycle Bin from Desktop
- Stop Windows from Upgrading to Windows 11
- 9 Methods to Recover Deleted Chrome History
- Recover Deleted Files from USB Flash Drive
- Restore Corrupted Files on Windows
- SD Card Recovery: Recover Data from SD Card
- Solid State Drive (SSD) Data Recovery
- Everything About Windows 10/11 Startup Folder